
I am sitting in front of my computer and typing a long email to a lovely reader who asked me: “How can I start a programming blog?”
This email is ridiculously long and packed with helpful tips and strategies, so I thought I’d share it here with everyone!
While it’s easy to launch a tech blog these days, it’s difficult to know how to do it the right way and set up your blog for long-term success.
Because the truth is:
If you are serious about building an online presence and perhaps even making money with your tech blog, you want to get it right from the get-go.
Starting your own programming blog is a great way to share your knowledge with the world, help like-minded people interested in tech, and positioning yourself as an expert in your field.
Even if you are new to programming, it’s never too early to start blogging about your experiences.
I started teaching myself how to code in September 2016, and I launched this blog just three months later in late December 2016.
Why?
Because I wanted to give back to the tech community and share my favorite resources with others who were interested in learning the same tools.
I’ve made a few big mistakes along the way, and learned a lot about how to run a tech blog as a one-man show.
That’s why I put together this massive article on how to start a programming blog step-by-step.
I’ll walk you through the technical setup, the basics of the WordPress CMS, my top traffic tips, and a few ideas for making money with your blog.
If you are wondering, “how can I start a tech blog?” then you’ve come to the right place.
Let’s get started!
Please note: This post contains affiliate links to products I use and recommend. I may receive a small commission if you purchase through one of my links, at no additional cost to you. Thank you for your support!
How to launch a programming blog in 9 steps
- Choose your blog topic
- Pick a name for your blog
- Sign up for web hosting
- Install WordPress
- Customize your blog design
- Create main pages (About, Contact)
- Create valuable content
- Promote your blog
- Make money with your blog
Step 1: Choose your programming blog niche
First, it’s time to pick a niche for your tech blog.
Your niche is the specific focus area that your blog posts and other content covers.
I see lots of beginner bloggers who want to write blog posts on just about any topic they can think of:
- Programming tips
- Lifestyle topics
- Fashion inspiration
- Travel stories
- Financial planning etc.
At first sight, it may feel like a good idea to write about a handful of topics. You know, the more diverse the content, the bigger the potential audience, right?
Wrong.
To build a loyal readership and establish yourself as an authority, you need to be super specific about your blog topic.
Choosing a narrow field to focus on helps you target a very certain demographic – your target audience.
It also helps you create more content about that particular topic. That will keep your readers more engaged because they can find several helpful articles on the same blog.
Also, Google loves niche blogs with a laser focus on a specific topic.
Niche ideas for programming and tech blogs
So what’s a good niche for your programming blog?
Here are a few examples for tech blog niches:
- Programming resources and courses
- JavaScript programming tutorials
- Back-end programming
- Front end frameworks and libraries
- Learning strategies and tips for new programmers
- Web development tools and resources
- Database management
- Cybersecurity
- Machine learning and artificial intelligence
- Mobile app development for Android/iOS
The list goes on!
How to choose the perfect niche
You will spend a lot of time researching and creating content for your blog.
To keep yourself motivated, find a topic you enjoy learning and researching. Otherwise, blogging will feel like a chore, and you will most probably give up sooner than you think.
Think about your own programming journey so far. Answer these questions to find niche ideas right now:
- What tools and programming languages have you learned?
- Which ones were your favorites?
- What tools do you enjoy working with and learning?
- What’s your long-term goal for your tech journey?
- When you read tech blogs, which topics do you search for?
- Which tools and topics do you talk about with your fellow techies?
- What’s the one programming topic you can’t shut up about?
For example, if you are learning front-end web development, why not start a web design blog? You could share helpful learning strategies and resources for programming web projects.
I launched this blog when I started to learn how to code back in 2016.
Teaching myself tech skills was difficult, and it felt overwhelming to know where to start. That’s why I wanted to help others going through the same stuff by sharing my experience.
Step 2: Pick a (domain) name for your blog
Once you know what to blog about, it’s time to choose a domain name for your blog.
Your domain name should reflect that name and brand. Your domain name is the online address for your website. That’s what people type into their browsers to visit your blog.
For example, the domain name for this blog is “mikkegoes.com”.
How to pick a good blog domain name
Here are a few tips for picking a good domain name:
- Keep it short:
It has to be something people can type into their browsers. - Include a relevant keyword:
If you blog about programming, include a tech-related keyword. - Make it easy to spell:
Avoid words that are difficult to write and prone to typos. - Avoid copyright issues:
Never register a domain that’s even close to a big brand. Domains including stuff like “Cola-Coca” or “Mircosoft” will get your butt to court faster than you think.
Take a few moments to find a good domain name for your blog. But don’t get hung up on this step. My domain name doesn’t make any sense but here I am, still going strong!
How to register a domain name
Domain name registrars allow you to use a domain name for a given period, most often 12 months.
The easiest way is to register your domain with your web hosting provider – which we will cover in just a bit. It just makes things easier to have everything under one roof.
The biggest benefit of combining your domain name registration and web hosting is that some web hosts give you a free domain name for the first 12 months.
It’ll save you about $15–20. If you want to start your programming blog on a shoestring budget, that’s a nice perk.
But you may want to keep your domain and web hosting separate. It’s up to you.
Here are my recommended domain name registrars:
- Bluehost:
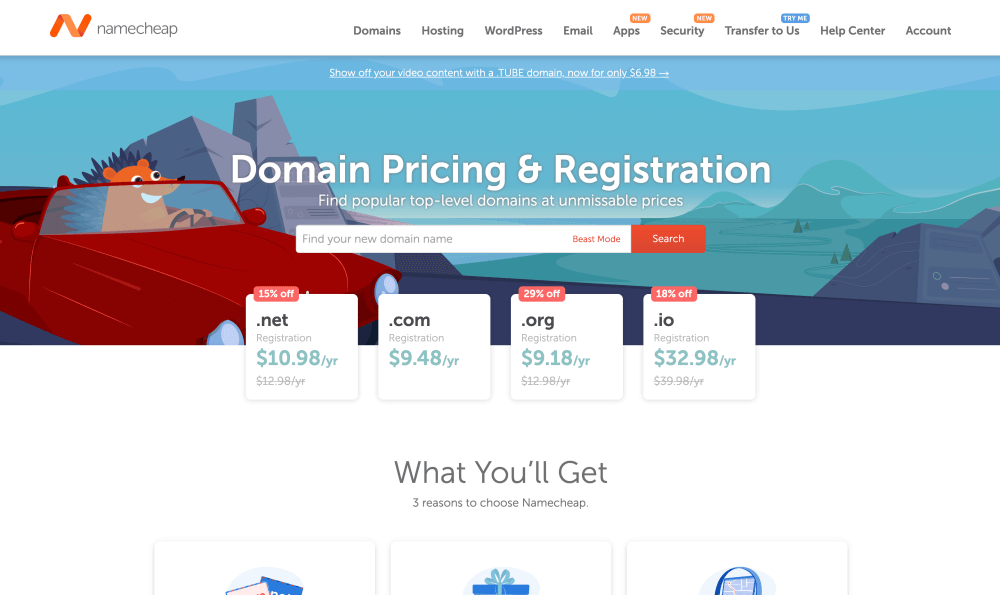
You get a free domain name for 12 months when you sign up for web hosting. - Namecheap:
Super popular because they offer very affordable domains. Also, easy to use and the customer support is amazing.
Step 3: Sign up for web hosting
You are interested in programming and tech, so I assume that you know the basics of how websites work.
Web hosting means that you rent storage space on a server that’s connected to the Internet.
Your host stores all your website files on their web server, making sure people can access your blog when they type in your URL.
How to find the right web hosting provider?
There are several reliable web hosting providers you can use to host your blog.
You want to pick a host that has a reliable track record, offers 5-star customer support, and prioritizes speed and security.
Here are 5 essentials you should look out for when choosing your web hosting:
- Customer service and support:
If you are new to blogging, you will have questions sooner or later. Pick a hosting company that offers 24/7 customer support, preferably in your native language. - Server performance:
If you want to self-code your blog website, make sure your web host supports the programming languages and tools you want to use. If you use WordPress, you should sign up for WordPress-specialized hosting. - Free domain name:
Some hosting providers offer a free domain name for the first 12 months. - Free SSL certificate:
Your web hosting plan should include a free SSL certificate for security. - Pricing and plans:
Shared hosting is an affordable way to start your programming blog. It’s also very affordable, starting at just $2–3 per month. To get the biggest discounts, you usually need to pay for 2–3 years upfront.
I mentioned shared hosting in the list, which is the cheapest type of hosting available. Shared hosting simply means that your tech blog will be stored on the same server with other websites, so the resources will be shared.
When you are getting started and want to get your programming blog up and running quickly and easily, shared hosting is a great option.
The best shared hosting provider for your blog: Bluehost
If you want to start your blog right away and appreciate convenience, I recommend using Bluehost.
I started this blog in 2016 with them because their service checked all the boxes. I’ve been hosting websites with Bluehost ever since.
In 2018 I had a horrible experience with another hosting provider, and ended up migrating all my 18 domains and websites to Bluehost, too.
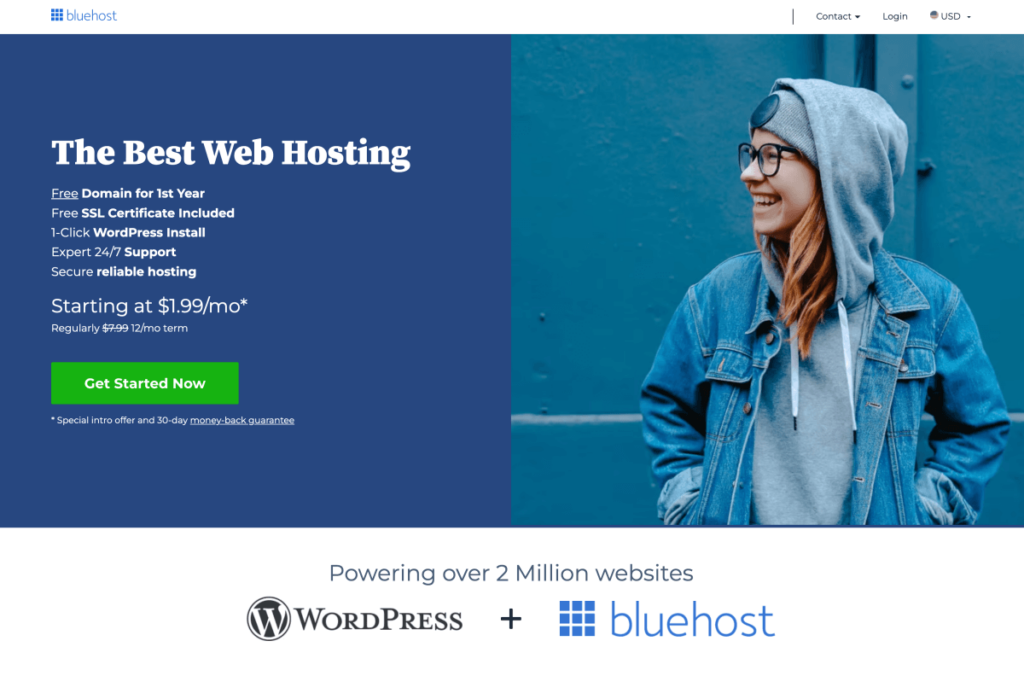
Bluehost is an easy, straightforward provider for starting your blog within minutes.
They are mostly geared towards non-techies who appreciate a simplified technical setup and a user-friendly dashboard for managing everything.
Bluehost offers a few different types of hosting:
- Shared hosting:
Your blog website will “live” on a server with a number of other websites and share the same resources. Thus, the overall performance resources are shared across all websites on that same virtual machine. This is the most affordable type of hosting available. - VPS or Virtual Private Server:
VPS means that the server resources in your plan belong to your blog website alone. Better performance but more expensive than shared hosting. - Dedicated hosting:
Your blog website will live on a dedicated, physical machine. The most expensive option.
When you are starting a simple programming blog, use shared hosting.
It’s incredibly affordable and a great opportunity to learn more about how to manage your own website.
Once your blog traffic grows, you can upgrade to a higher-performance hosting plan.
Here’s what I do with my websites, and what I recommend:
Start with shared hosting with Bluehost
Always start your tech blog on shared hosting. It’s quick, convenient, and very affordable.
You can play around with it, get comfortable managing your programming blog, create blog posts, and promote your content.
When you start seeing significant traffic and want to improve the technical performance and loading speed, you can upgrade to a higher-tier hosting plan.
I started with the cheapest Bluehost shared hosting plan, “Basic”.
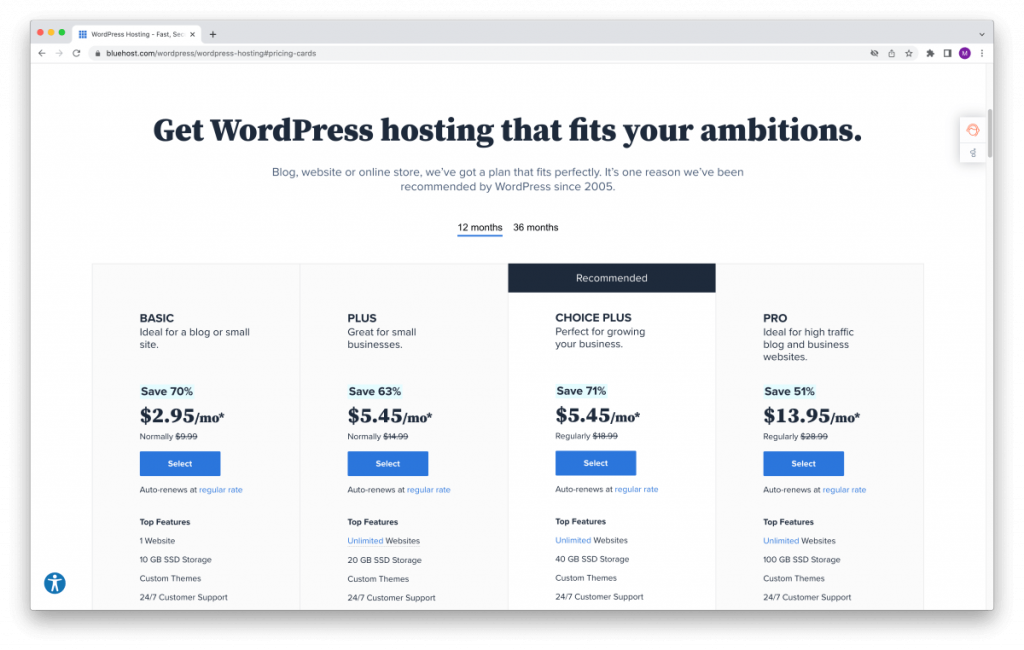
When my traffic grew and I needed more power, I upgraded to “Choice Plus” and then to “Pro”.
Upgrade to managed hosting with WP Engine or Kinsta
After a couple of years, my blog generated too much traffic for a shared hosting plan.
I want my readers to have a smooth experience perusing my blog posts, so I needed a hosting solution with better technical performance.
I built this blog with WordPress, so I signed up for managed WordPress hosting with WP Engine.
Their performance is top-notch, and I have nothing bad to say about their service.
More recently, I migrated this blog to Kinsta. They offer top performance for high-traffic websites, and take care of everything for me.
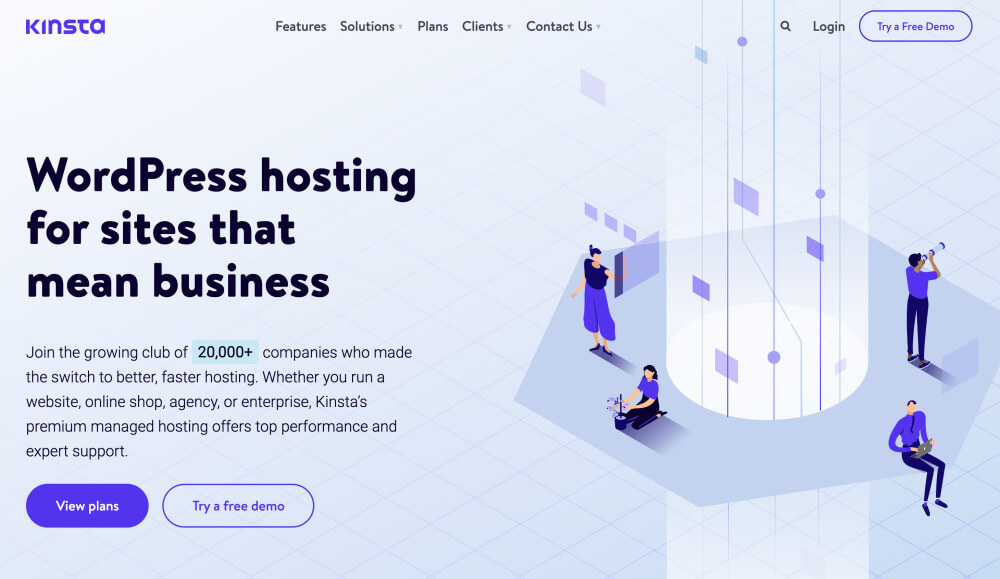
Their plans start at $30/month, so it’s considerably more expensive than shared hosting. But don’t worry, you won’t need managed hosting when you’re just getting started.
Take some time to compare a few web hosting providers. It’s a good idea to weigh out their pros and cons, and pick the company that checks all the boxes for you.
Step 4: Install WordPress
Now that your web hosting is all set up, it’s time to install and configure WordPress.
I mentioned this earlier already, but I strongly recommend that you use the free WordPress content management system to run your blog.
Why?
Because WordPress makes your life easier. You could build your own CMS from the ground up. But since you are reading this, I assume that you want to start a blog the convenient way.
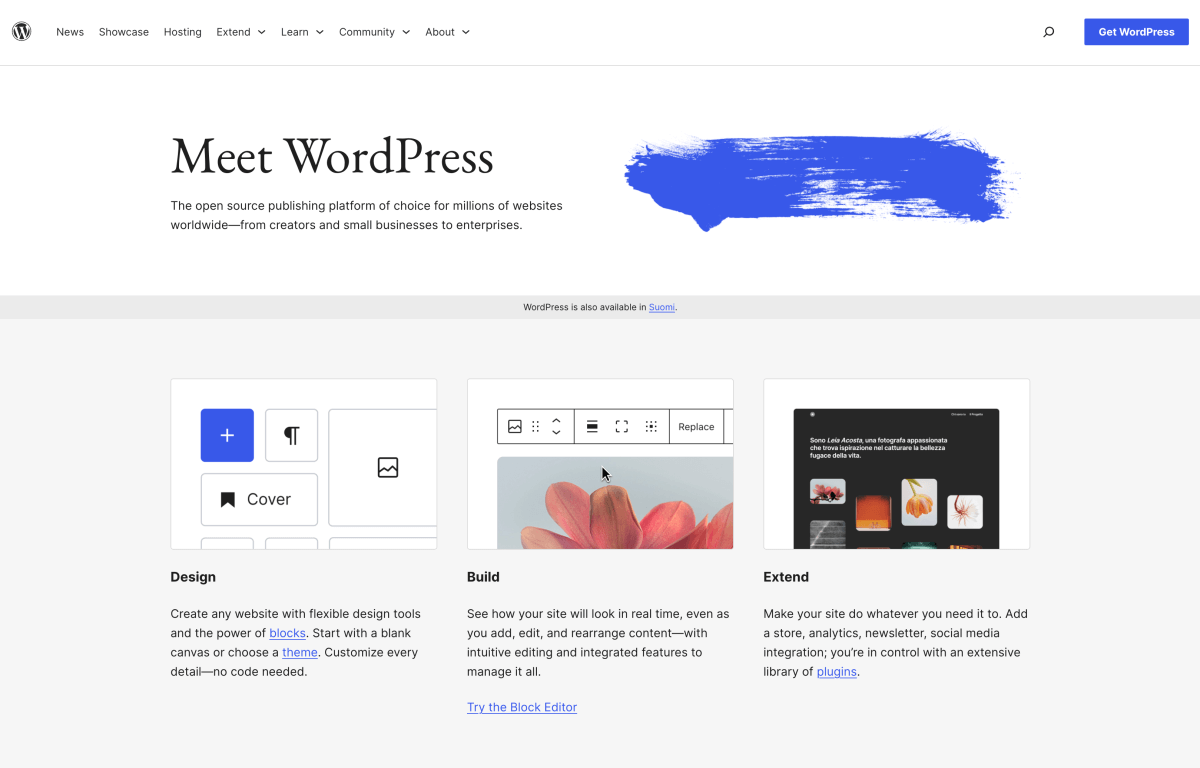
What is WordPress?
If you are not familiar, WordPress a piece of sofware that allows you to manage your blog easily.
In fact, WordPress powers a whopping 34% of all websites on the Internet.
It’s the most popular CMS worldwide, with a market share of 42%.
Millions of bloggers use WordPress, and so do big brands like Forbes, NBC, TechCrunch, and many others.
I use WordPress for this blog, too, and for about 90% of all website projects I build for my clients.
Thanks to its popularity, WordPress is the most sustainable long-term CMS for starting your programming blog.
Now, WordPress comes in two versions: WordPress.com and WordPress.org. The names are almost identical, but the platforms are very different.
Here are the key features and differences between WordPress.com and WordPress.org:
WordPress.com:
- Is free to use (with limited features + paid upgrades)
- Has limited support and design options
- Doesn’t allow you to use a custom domain name
- Doesn’t let you use plugins
- Offers limited SEO tools and analytics
- Has limited monetization options
WordPress.org:
- Is the “self-hosted” WordPress platform (free to use, but you need a web hosting plan)
- Gives you total control over your blog content
- Allows you to customize your design without restrictions
- Strong SEO tools and features to grow your traffic faster
- Allows you to use WordPress plugins freely
- Lets you launch an online shop or membership site
If you ask me, never use the “free” WordPress.com platform.
If you do, you don’t own your content or your traffic. You will essentially be boosting the WordPress.com platform instead of building your own brand and audience.
The self-hosted WordPress.org platform is the only sensible option if you are serious about starting a programming blog that people take seriously.
How to install WordPress on Bluehost
In the previous section, we talked about how easy it is to start a programming blog on Bluehost.
And it gets better:
With Bluehost, you don’t need to install WordPress. They install it for you in the background during your signup process.
In other words: you can start blogging right away.
When you signed up, Bluehost sent you an email with the login instructions and credentials to your WordPress dashboard. That’s where you will find all the details you need to access your WordPress installation:
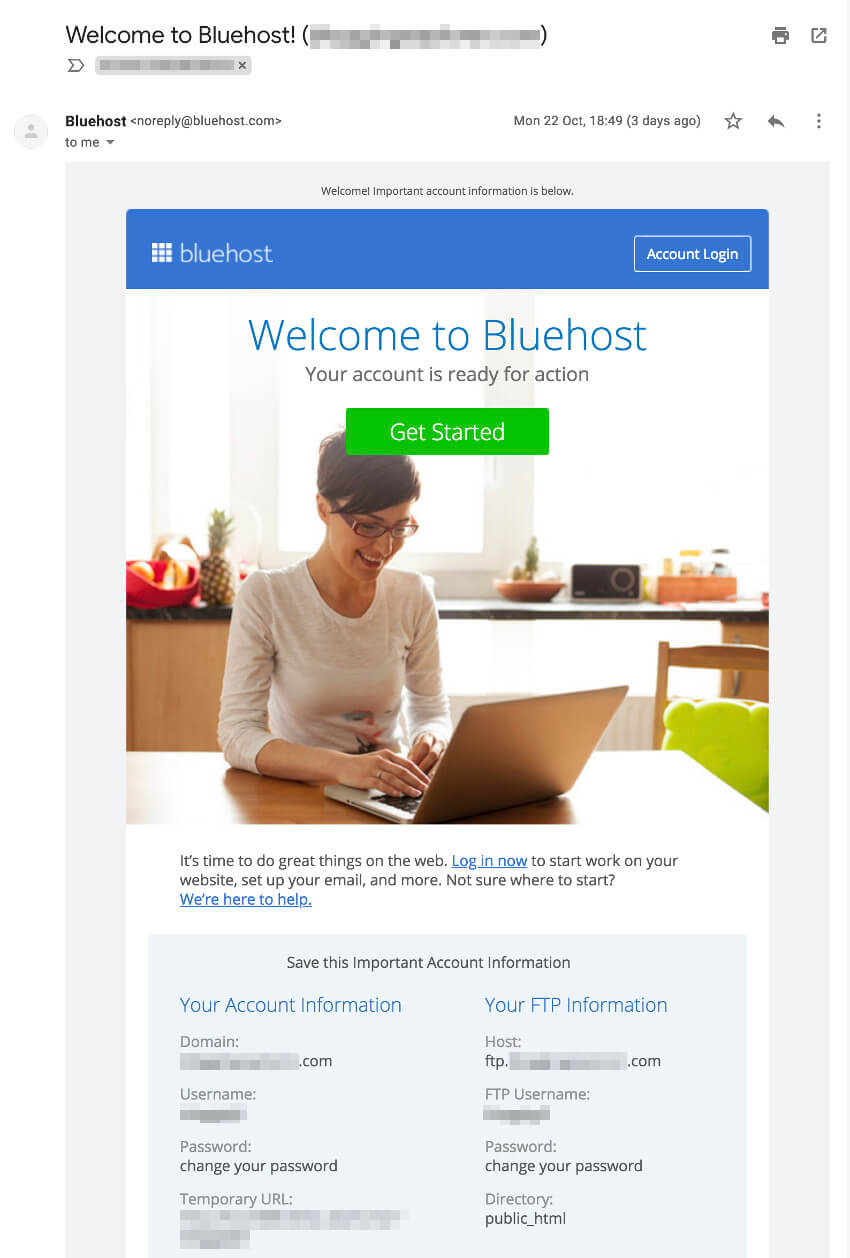
Most popular hosting providers install WordPress automatically for you. Or they offer a 1-click installation feature in your hosting account dashboard or cPanel.
For the exact details, please check with your web host.
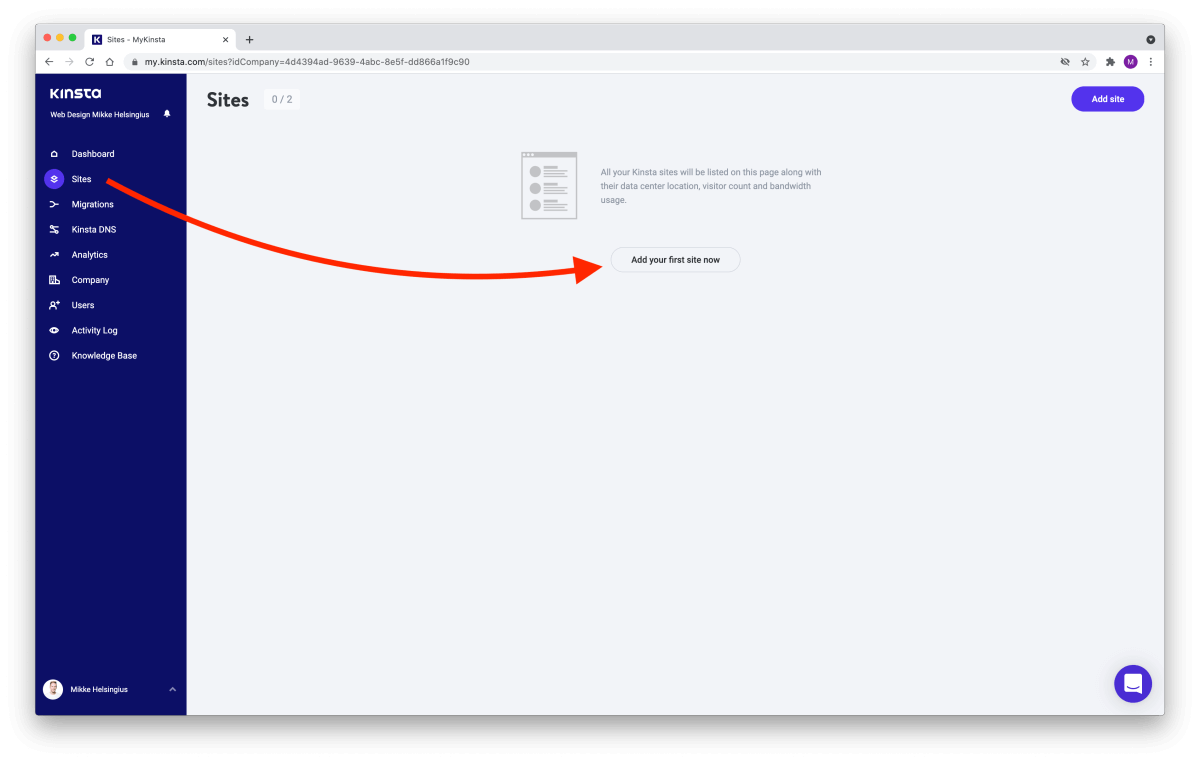
How to install WordPress on Kinsta
If you use Kinsta, you can install WordPress in your dashboard. Navigate to Sites and click on Add site:
Select Install WordPress and fill in the details of your site:
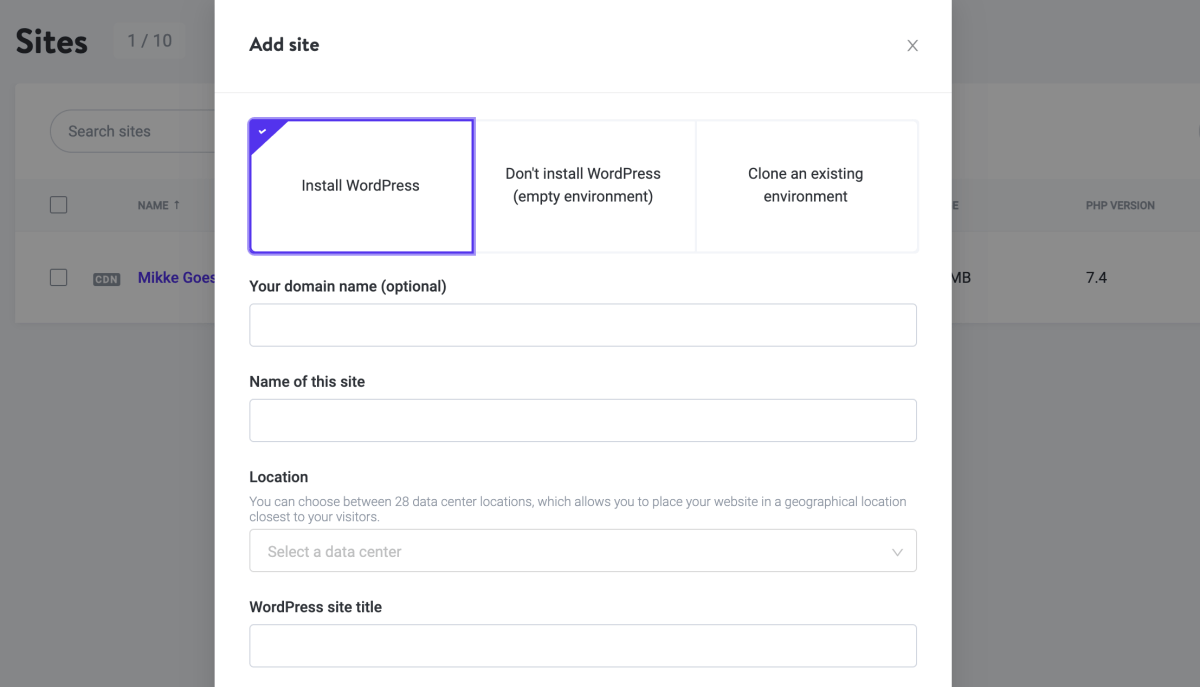
It will take a few minutes for your site to be installed and configured.
When everything is set up, you can access WordPress through the site dashboard.
Step 5: Customize your programming blog with a WordPress theme
Now that we’re covered the technical setup for your programming blog, it’s time for the fun part.
WordPress uses “themes” for customizing the look and feel of your blog.
Your theme determines what customization options you have, and what parts of your programming blog you can adjust.
Keep your blog clean and easy to read. A simple, clear layout tells your visitors that you care enough to make your programming blog easy to read and navigate.
When it comes to the design, less is more.
How to find the right WordPress theme?
Right now, you shouldn’t spend too much time on the design.
Once you’ve built a bigger audience and get more visitors, you can invest some time and money in customizing your tech blog.
At this point, use a pre-installed WordPress theme. The built-in themes are easy to use, super clean, and created by professional designers.
To choose a theme for your programming blog, open your WordPress dashboard and navigate to Appearance > Themes > Add New > Popular.
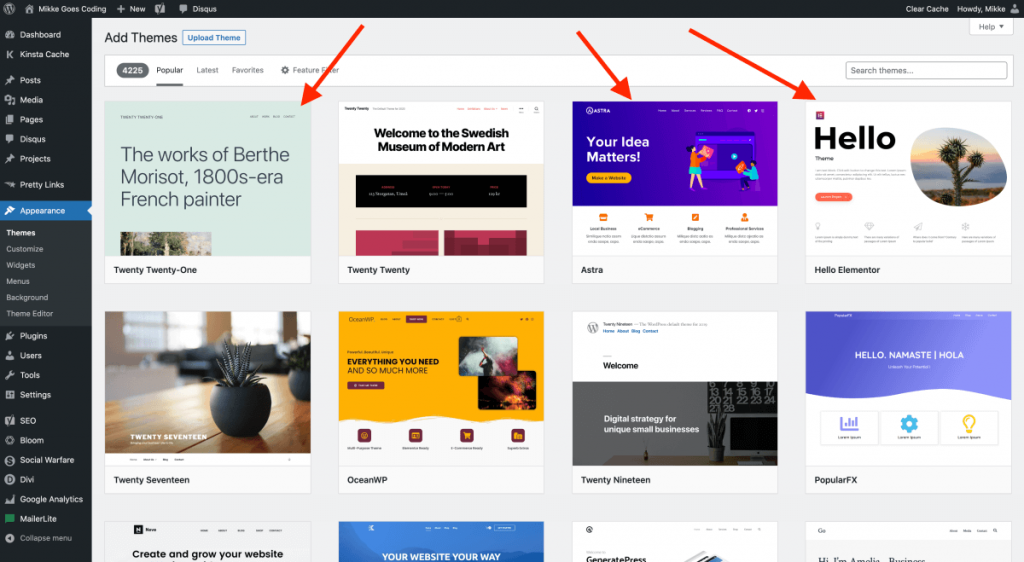
Use the search feature to find beautiful free themes.
I recommend these three free themes to get started:
- Twenty Twenty-Four (comes pre-installed)
- Hello Elementor
- Astra
Twenty-Twenty Four is a standard WordPress theme that come pre-installed. WordPress usually releases one standard theme every year.
With Hello Elementor and Astra, you can upgrade to a premium version later if you want to.
Pick one of these themes and click Install.
Once the installation is complete, click Activate.
You have now successfully installed and activated a professional-looking theme on your programming blog.
Visit the front-end of your blog to see the theme in action. Your site should look entirely different.
When do you need a paid WordPress theme?
Once your programming blog grows and you feel more familiar with WordPress, a free theme may feel too restrictive.
The customization options are always more limited than with paid themes.
You may want to design a custom header and navigation bar, or a custom blog post template, for example. You can’t do that with a free WordPress theme.
Also, free themes don’t have a support team to answer your questions. If you’re not a designer, you may need a helping hand every now and then.
When should you buy a paid WordPress theme for your programming blog?
If you have a few extra bucks and need more powerful customization options, invest in a paid theme.
That way, you can customize every little detail on your blog, and the investment will pay itself back.
Paid themes offer customer support, so you can always contact an expert with any questions you may have.
Here are a few benefits paid themes offer:
- Easier customization:
Premium themes allow you to customize just about everything on your WordPress blog: blog post layout, header and footer, etc. - Intuitive page builders:
Most premium themes include a page builder tool, making it super easy to build professional-looking layouts with minimal design skills. - Better customer support:
You will have questions about designing your blog. Most paid themes offer 24/7 customer support to help you out. - SEO benefits:
Premium themes are often optimized for search engines.
Paid themes can be a huge time-saver because you won’t be left alone with your questions.
I used a free theme for a few weeks when I launched this blog, and I was really happy with it.
But after a while, I became more interested in customizing everything you see on the blog.
The best paid WordPress themes in 2024
I’ve been building WordPress blogs since 2016, and I’ve used a handful of paid themes throughout the years.
I currently use these two themes for my projects:
1: Divi
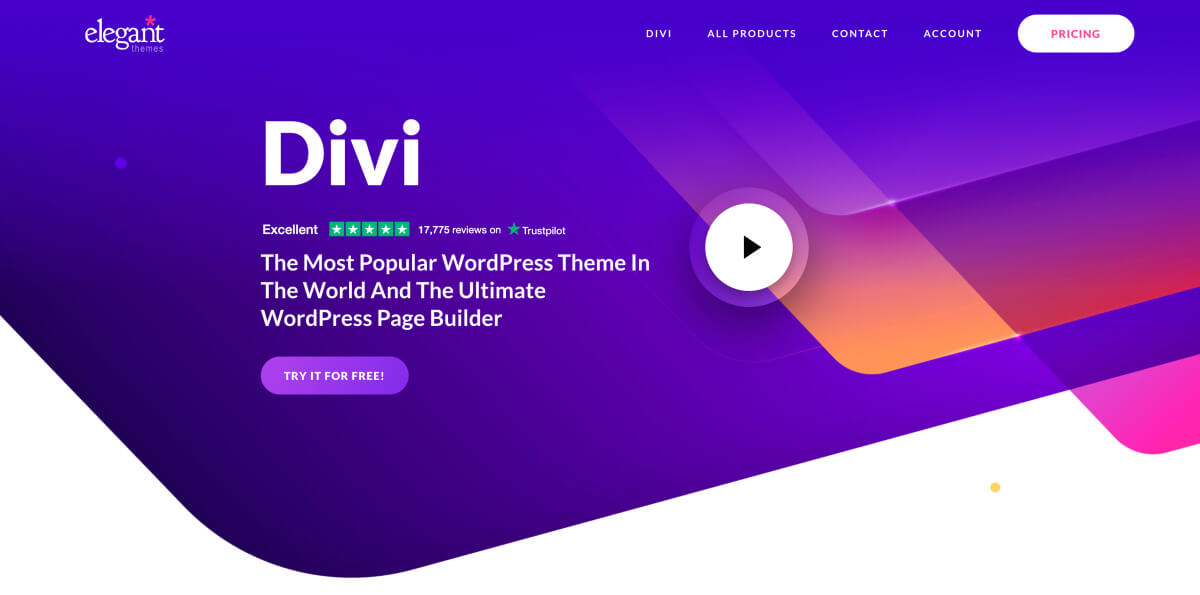
I started using Divi in 2017, and I fell in love right away.
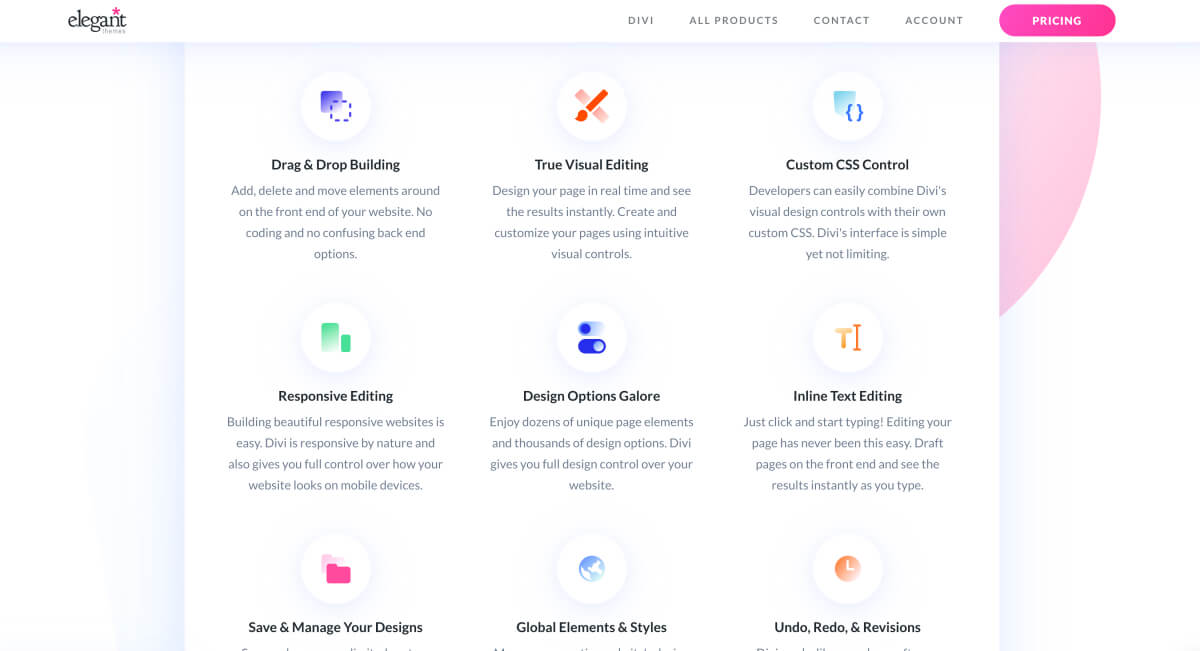
Divi comes with an intuitive page builder that allows you to build your page layouts visually using drag-and-drop.
You can edit your page layouts and contents directly on the front end, and see how your page will look in real time.
The customer support is phenomenal, and available 24/7.
Divi is one of the most popular WordPress themes worldwide with a thriving global community.
You can find tons of guides and resources for inspiration and help from other Divi enthusiasts around the world.
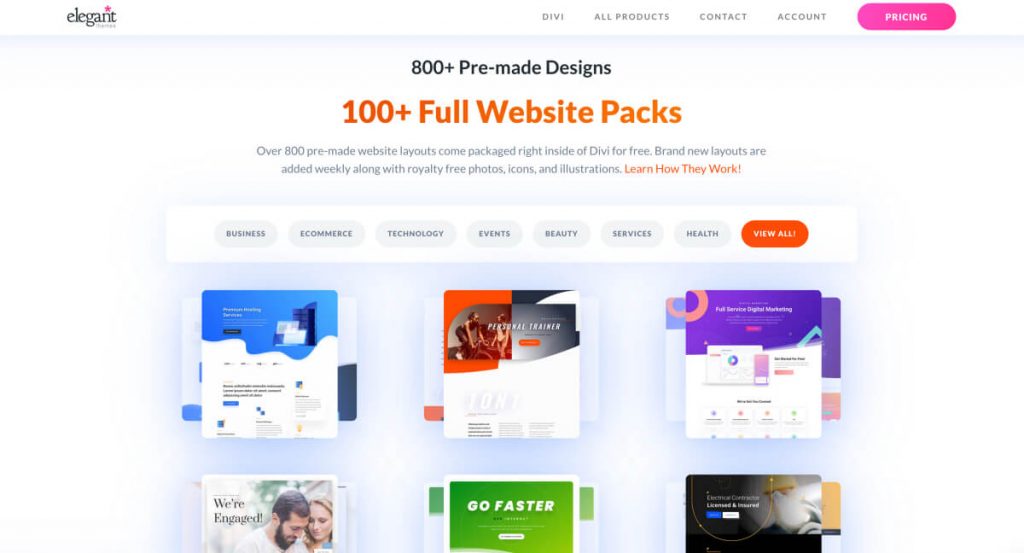
If design isn’t your thing, Divi also comes with 100+ pre-designed website layouts you can use right away.
Create a new page in WordPress, open the Divi page builder, and import any of the 800+ page designs you like.
Update the text content, adjust images, and customize the colors if you want to.
These nifty layout packs allow you to create professional-looking pages and blog posts with just a few clicks.
I build WordPress websites for my clients with Divi because it’s so easy and intuitive to use.
Even if someone has never used WordPress before, I can give them a quick intro to using the page builder, and they can update their website on their own.
Divi is hands-down the best WordPress theme I’ve used so far. I really can’t recommend it enough.
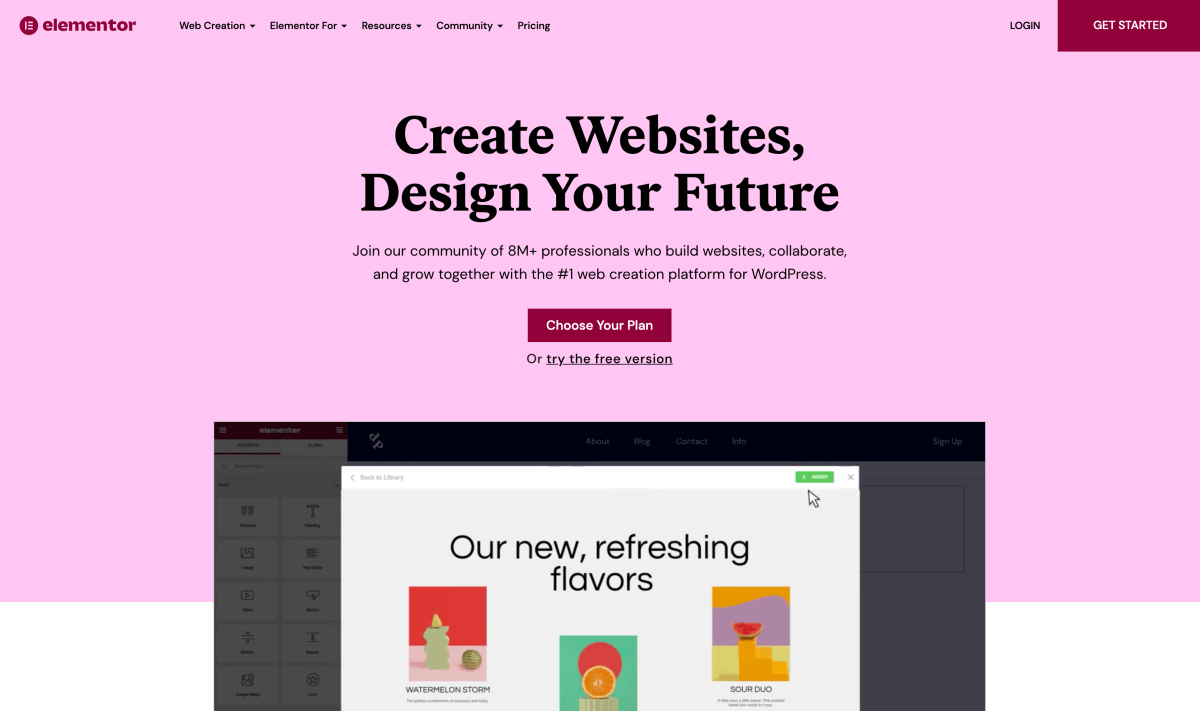
2: Hello Elementor & Elementor Pro
I discovered Elementor Pro in 2020, but didn’t start building websites with it until 2021.
Elementor Pro is the paid version of the Elementor page builder. You can use Elementor with almost any WordPress theme, but it’s best paired with Hello Elementor.
Compared to Divi, Elementor has more of a learning curve because the whole system is not quite as intuitive.
The builder has similar features, but the logic is somewhat different.
Step 6: Create essential pages (About, contact, legal)
When you launch your programming blog, you want to create a few main pages to introduce yourself.
Your readers should find at least these bits of information:
- Who you are
- What your blog is about
- Why they should listen to you
- How they can get in touch with you
Since you are running the blog, people want to know who’s behind the brand.
These main pages are all quite standard, but you can be creative and show your personality, too.
To create these pages, you need to know how to create a new page in WordPress to start with.
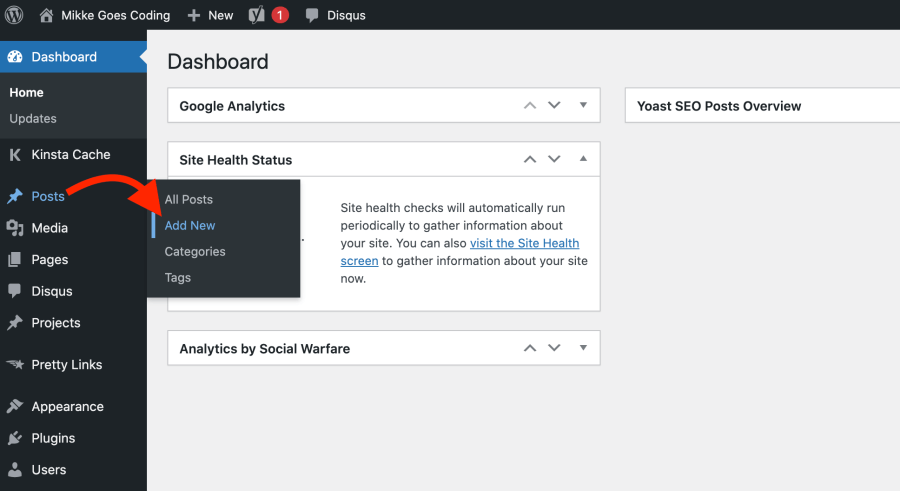
To create a new page, open your WordPress dashboard and navigate to Pages > Add New.
You will now see the default page editor with a blank page template:
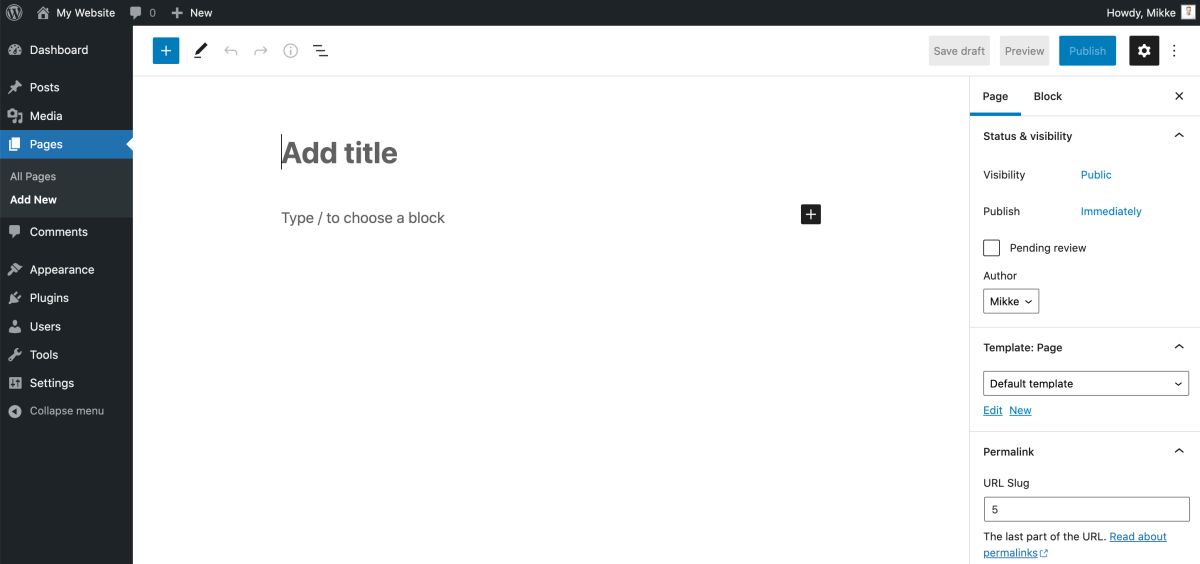
Here’s how to navigate the page editor:
- Type your page title at the top where it says “Add title”
- Add headings, paragraphs, lists, and other content blocks beneath it
- Hit Publish in the top right corner when your page is done
Now let’s look at three important pages you should create: About, Contact, and Legal Pages:
1: About page
Did you know that the “About” page is often one of the most visited pages?
It’s your #1 chance to tell your story and explain how you want to help your readers with your programming blog. You can also share relevant details for potential cooperations and clients who may want to hire you.
Here are a few points you should cover on your about page:
- How do you create value for your readers?
Talk briefly about who you are, but focus on how you help your readers. You want your readers to feel like they’re in the right place. - Who is your blog for?
Your fellow programmers need to know if you’re the right blogger to follow. If your blog is about finding free learning resources for Python, you can write “this blog helps beginner programmers find free courses and tutorials to learn Python online” - What common ground do you have?
Your readers are looking for someone they can relate to. Show them that you are active in your niche. For example, contribute to relevant open-source projects, write for other programming blogs, or be active on popular discussion forums. - Why should they read your blog posts?
Explain what your readers will get from reading your blog posts, and why they should listen to you.
2: Contact page
When your programming blog is brand new, your contact page can be very simple. List your email address and relevant social media accounts, and you’re done.
Once you start seeing traffic, you may want to add a custom contact form. You can build one easily with the free Contact Form 7 plugin, for example.
Be mindful of what you put on your contact page.
Answer these questions before building it:
- Who’s visiting the contact page?
- What information are they looking for?
If you expect your readers to send you questions, you may want to add a link to your FAQ page to avoid a flood of repetitive emails.
If you want to draw in potential clients and brand cooperations, offer more information about why they should work with you. Encourage them to get in touch by explaining what you do and how you can help them.
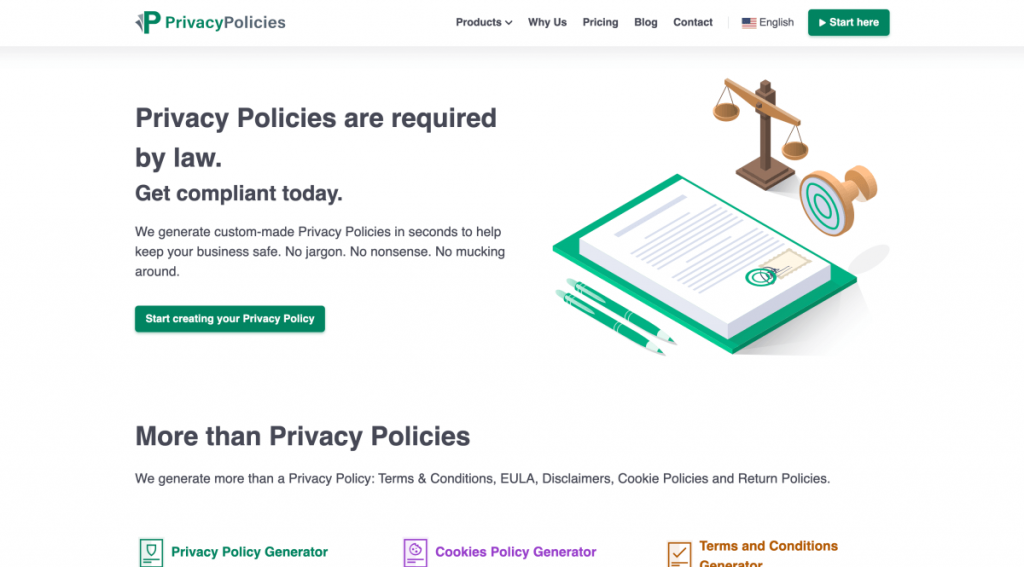
3: Legal pages (Privacy Policy, Disclaimer)
Finally, you should create the necessary legal pages, such as a Privacy Policy and a Disclaimer.
Your Privacy Policy tells your readers what information you collect from your visitors, and how you use that data. You want to check what details are required by your local legislation.
Your Disclaimer (or Disclosure) is required if you link to other websites, use affiliate links, or share tips on your blog that may result in damage to properties, persons, or pretty much anything.
For example, if someone uses your programming tutorials and their business website gets hacked, you could potentially be held responsible.
You can create your legal pages with this free service, for example.
Add the important pages to the navigation menu
Now that your most important pages are set up, let’s add them to the main navigation on your website.
This way, your visitors can easily find the information they are looking for.
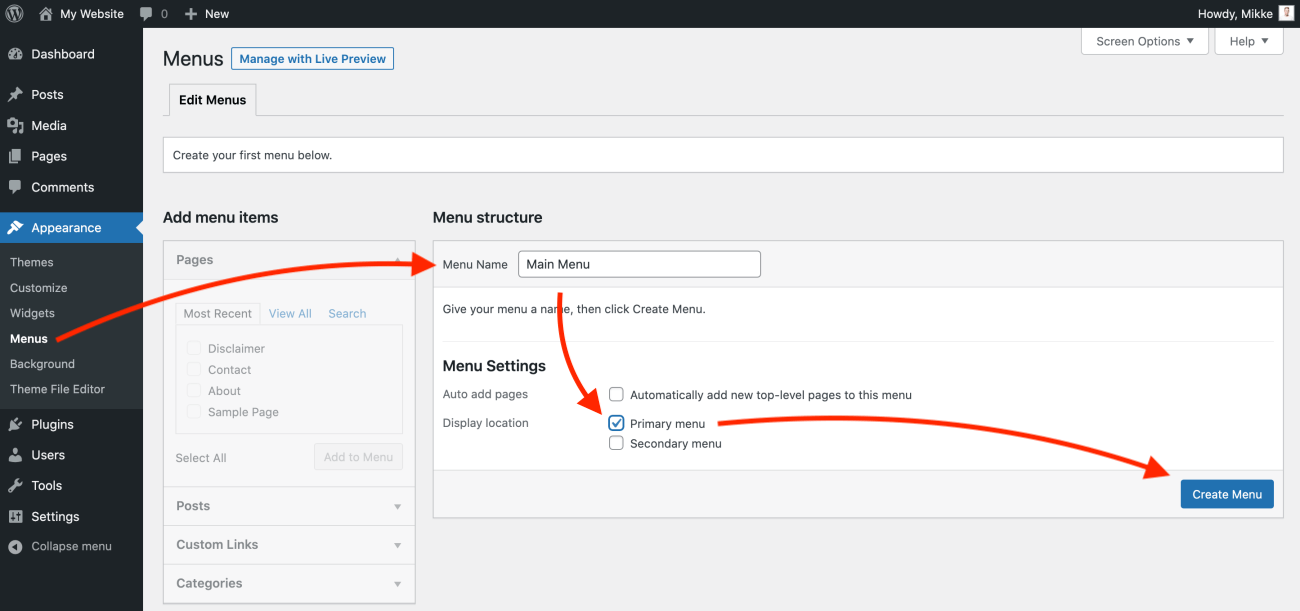
Open your WordPress dashboard and head over to Appearance > Menus.
This is where you can customize and manage your navigation menus.
First, you need to create your main navigation menu. Enter the name for your menu under Menu Name, select Primary menu for the display location, and click Create Menu:
Now you can dd the About and Contact pages to your new main menu. Select them from the Pages list and click Add to Menu:
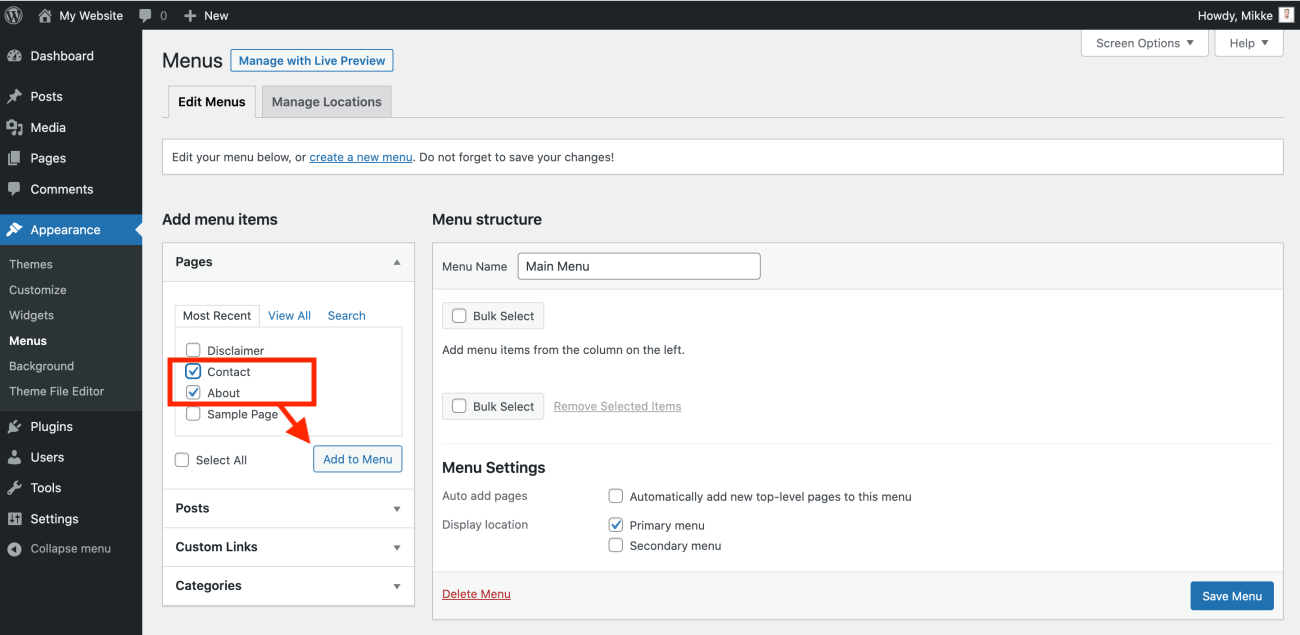
When you’re done, click Save Menu in the bottom right corner.
Now visit the front-end of your coding blog website to make sure that the new menu items are visible in the navigation bar.
Next, add the legal pages to your footer menu. Again, head over to Appearance > Menus.
Create another menu called Footer Menu following the steps above.
To modify the footer menu, select it from the dropdown:
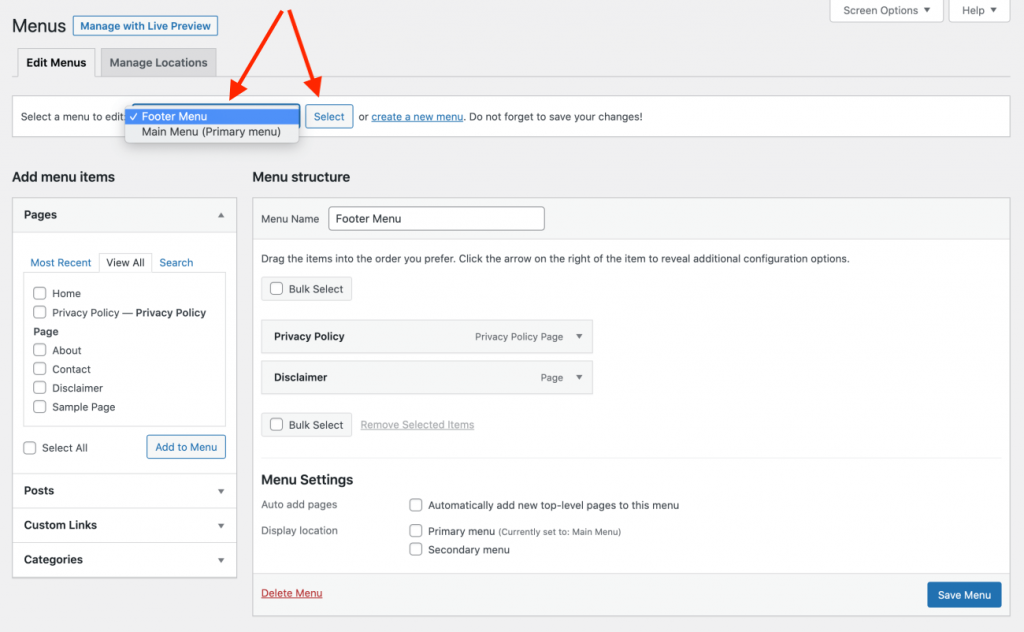
Add the legal pages to the menu and click Save Menu in the bottom right corner.
Congrats! You have now created your most important pages and added them to the right navigation menus for your visitors.
Step 7: Create valuable content
Now that you’re all set up with your WordPress theme, it’s time to start creating helpful content for your readers.
If you are serious about building a successful programming blog and a loyal audience, you need a clear, strong content strategy.
You don’t just want to start writing whatever pops up in your head. That’s a surefire recipe for disaster.
Instead, you want to focus on your target audience, yet again.
How to create “good” content?
People read blogs because they find helpful, valuable information. They care about what bloggers talk about, right?
To get in the right mindset for creating top-notch content, think about your blog topic:
- Why did you choose this topic?
- What do you know that other people don’t?
- How can you help others with your skills?
- Why should people listen to you?
- How can you deliver value to your readers?
The bottom line is that your content needs to :
- Solve problems
- Answer questions
Each blog post should focus on a very specific problem you want to solve for your readers.
How to find blog post ideas? (Keyword research)
Once you’ve chosen a niche to write about, you have to do keyword research. That’s simply a fancy word for figuring out what people type into search engines when they have a question and need help.
Keyword research is the only way to know what type of content your readers are interested in.
Hence, you need to learn how to think like your target audience.
When you know what they are searching for, you can create targeted content that answers their questions.
Let’s say your blog topic is “JavaScript programming”. Great choice!
The easiest way to find blog post ideas is to simply type that main keyword into Google. Let’s go over a few things you should pay attention to:
First, let’s start with the suggested keywords:
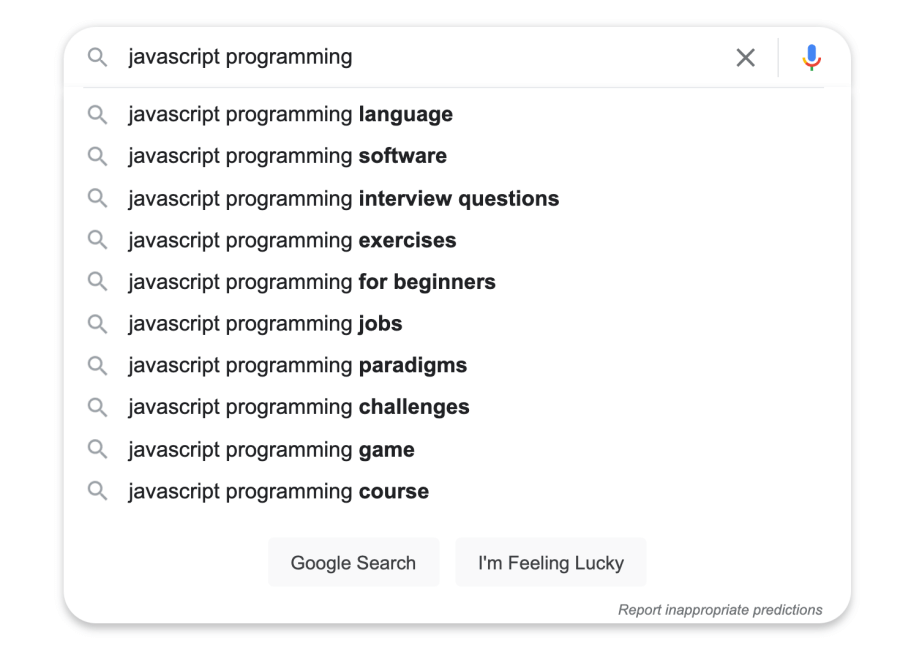
These are some of the most popular sub-topics for JavaScript programming.
Since JavaScript programming is such a high-level topic, you should probably narrow down your focus and blog about one of these suggested sub-topics.
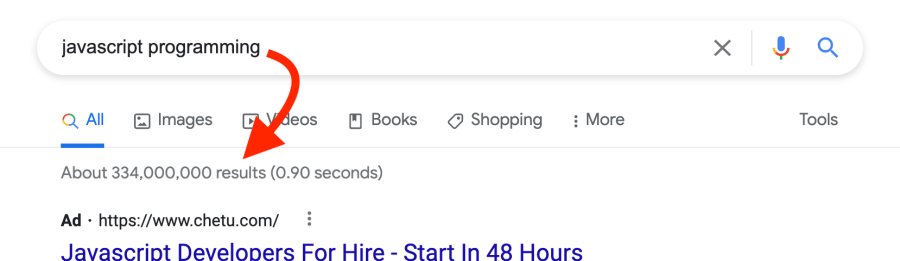
On the search results page we see that there are 338 million results, so it’s definitely a popular niche:
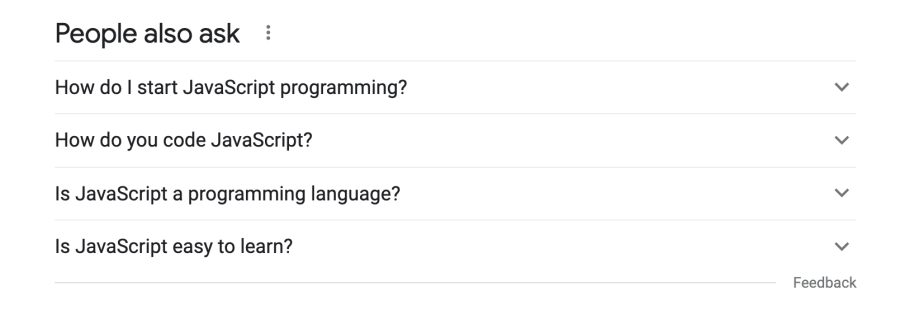
Within the search results, you see popular questions people are asking:
When you scroll down to the bottom of the search results page, you see more related search queries:
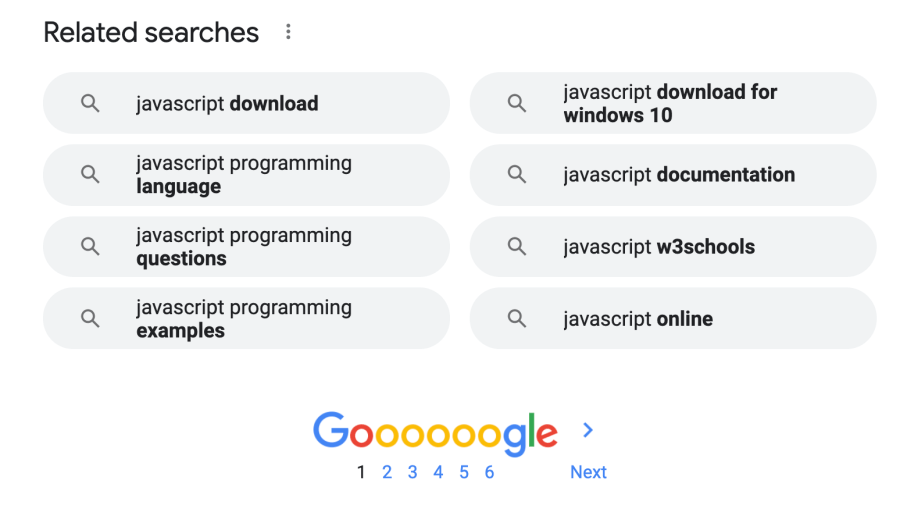
Use these insights to get an overview of what type of content people are searching for. You can repeat the search for more granular keywords, too.
Write down your findings in Trello or Google Sheets, for example.
You can use any other keyword research tool, too. I use KWFinder for finding low-competition keywords for my blog posts.
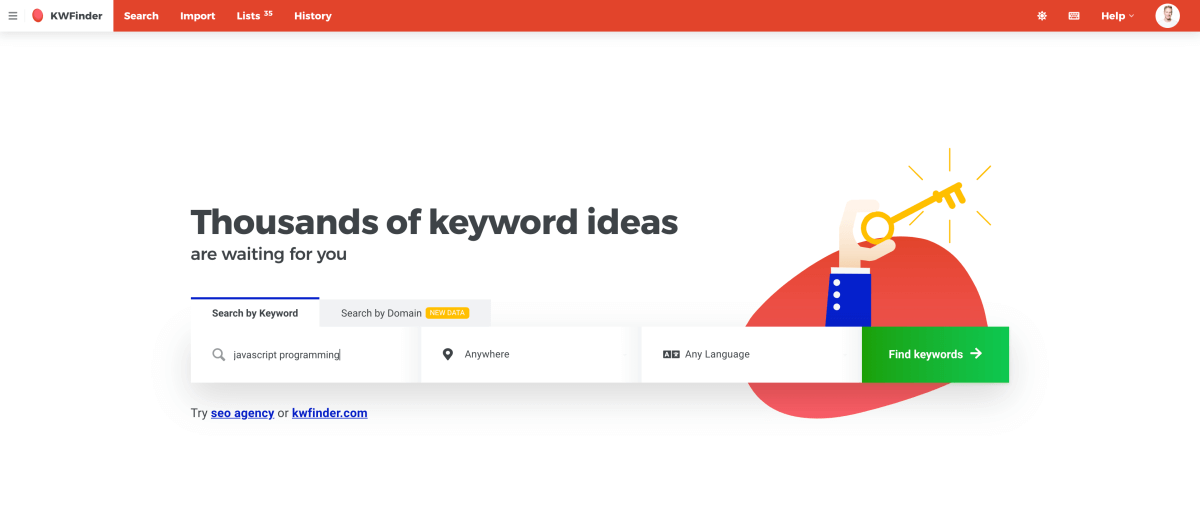
You get a few daily searches with a free KWFinder account, which is more than enough to get started.
When you type in your keyword and hit Search, you will see a list of related keywords on the left:
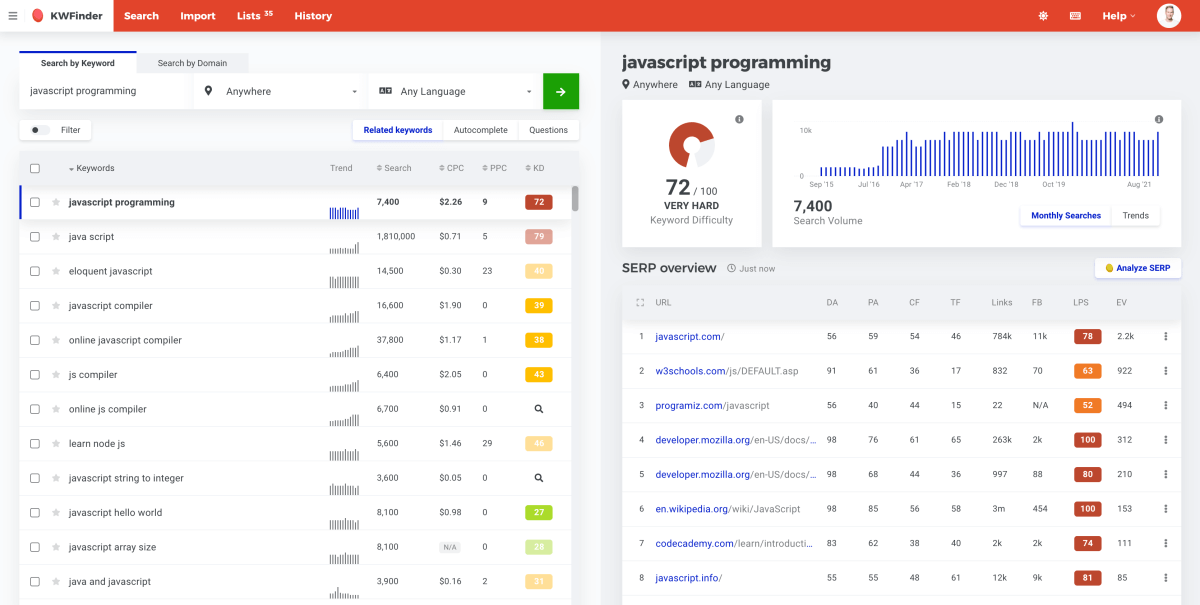
Pay attention to two things:
- Monthly search volume
- Keyword difficulty
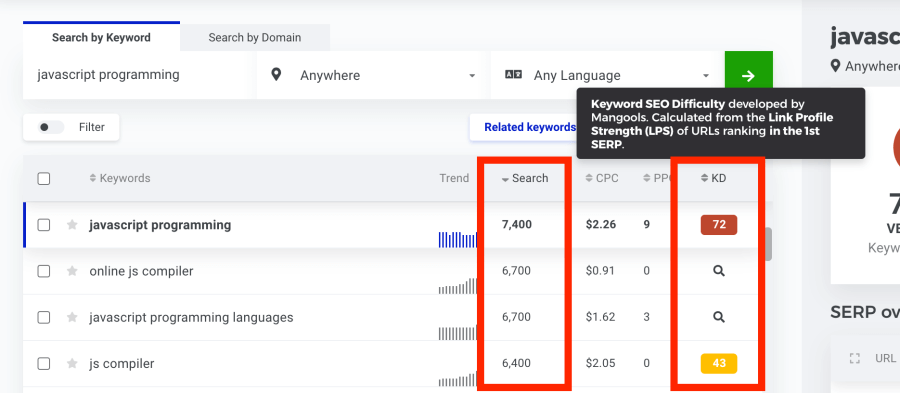
Higher search volumes usually mean higher competition – because everyone’s doing what you are doing right now.
For our keyword “JavaScript programming”, you can find tons of related keywords that are more granular and have less competition.
When your blog is brand new, you want to focus on low-competition keywords to gain some momentum.
Once you’ve created several in-depth blog posts about a specific topic, it becomes easier to rank on Google. That’s why you want to focus on a very specific niche when you start your programming blog.
When you establish yourself as an expert in a narrow niche, search engines start treating you like an authority in that area.
How to write the perfect blog post?
Once you’ve gathered enough blog post ideas, it’s time to start writing and creating!
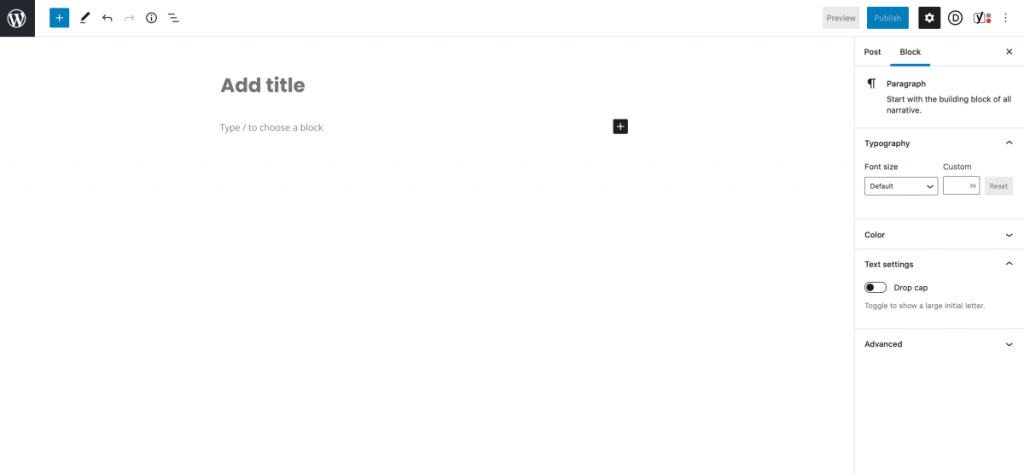
In your WordPress dashboard, go to Posts > Add New to create a new blog post draft:
You will now see the standard WordPress Gutenberg blog post editor:
Let’s go through a few hands-on tips for writing a great blog post.
Plan your blog post structure
Begin by creating headings for all the points you want to discuss in your article. This helps you write faster and stay on topic.
Write a compelling headline
Your headline determines whether people will actually click through to your blog and read your blog post.
Each blog post should address one question or problem, so make sure your headline reflects that.
Highlight your promise: why should people read your article?
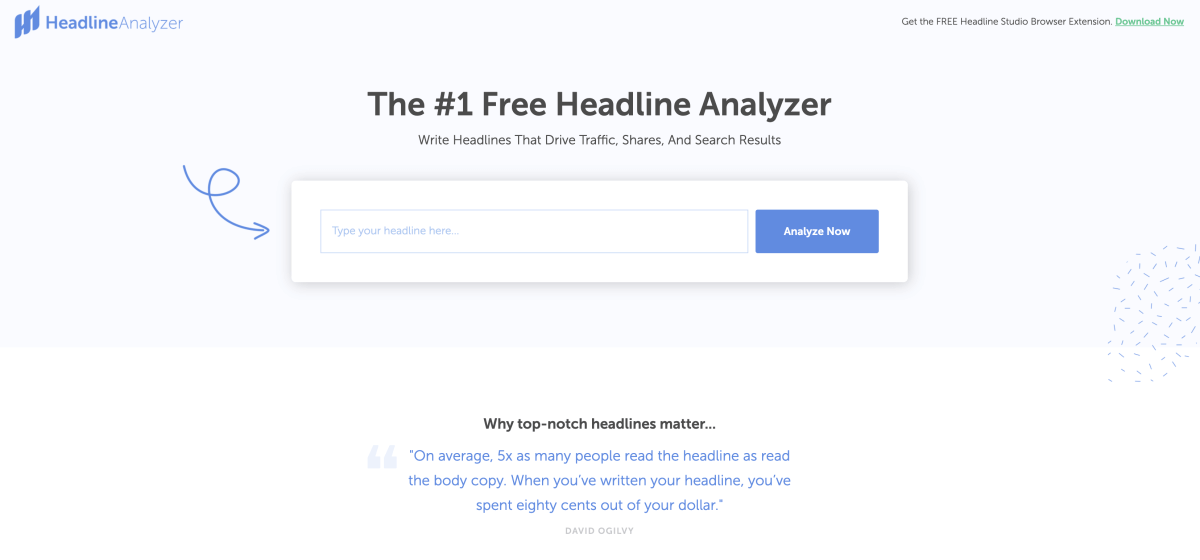
Use the CoSchedule Headline Analyzer to come up with the perfect title.
Write an engaging introduction
You only have a few sentences to convince your readers to stick around and read your entire blog post.
Here are a few simple tips for writing a great introduction:
- Start with a surprising statistic
- Use descriptive and colorful wording
- Tell a quick joke or a story
- Don’t state the obvious
You want to win the reader’s attention and get them on your side. Show them that they are in the right place: promise them the outcome what they are looking for – and then deliver it.
Use simple English
Make your articles as easy to read as possible.
Use plain English. Avoid complicated phrases and difficult words.
Write like you would talk to a friend or a neighbor. You want your readers to easily understand what your blog post is about.
The bottom line is:
A 10-year-old should understand what you’re trying to say.
Optimize the layout (Focus on readability)
When you start writing, readability is everything. You want to make the reading experience as enjoyable as possible.
People scan through blog posts. They only read the most interesting points.
Therefore, you want to use formatting to help your readers find what they are looking for.
Here are a few tips to optimize your content for readability:
- Stick to subtle colors
- Use a clear, large font
- Break up your text with headings, lists, and images
- Emphasize your main points (italic and bold text)
Ideally, your blog post will be 1,000+ words long. But don’t be wordy just to create longer blog posts.
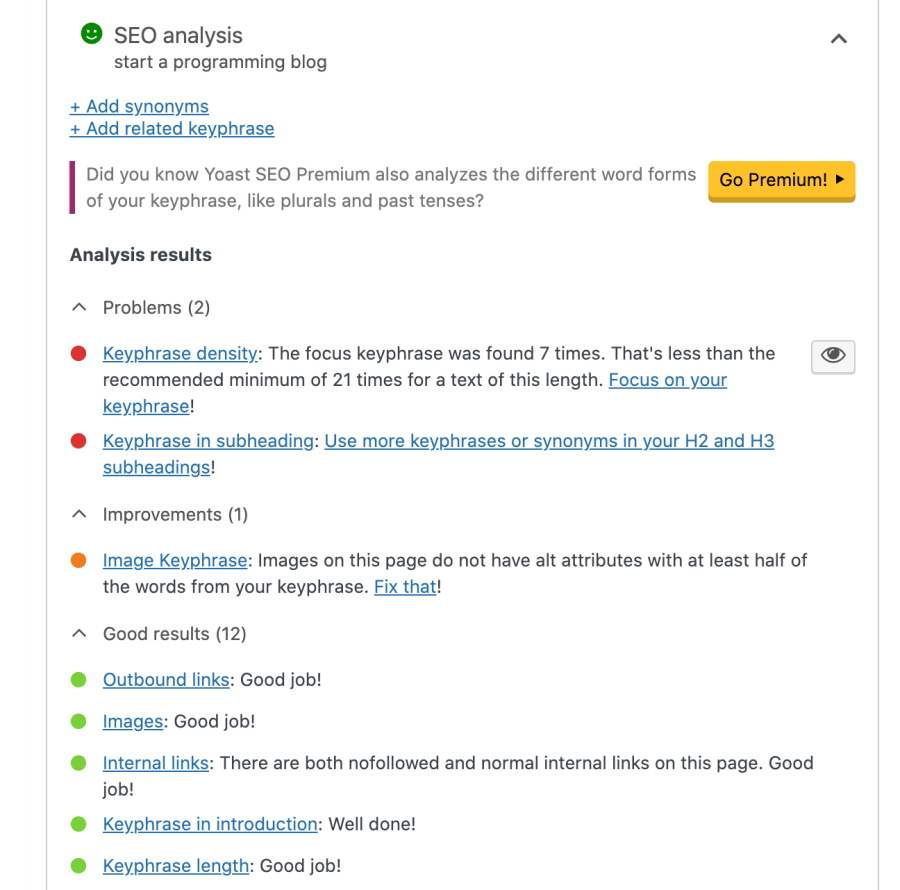
Use Yoast SEO to optimize your blog post
Yoast SEO is a free WordPress plugin you can use to optimize your blog posts for search engines.
You can set a specific target keyword for each blog post, and the plugin will make suggestions for improving it for readability and rankings.
For this blog post, I targeted the keyword “start a programming blog”. Here are the suggestions from Yoast SEO for improving my article:
Once you’re happy with your blog post, you’re ready to publish it!
Step 8: Promote your blog and get traffic
Once you’ve published your first blog posts, it’s time to learn how to grow your blog traffic.
Here are a few of the best ways to promote your blog and getting your content seen by the right people:
Use social media to get visitors
According to DataReportal, more than 5 billion people use social media – an equivalent to 62.3 percent of the world’s population.
Hence, social media is the best place to reach your target audience.
To get started, find out where your readers hang out online. It doesn’t make sense to promote your programming blog on Facebook if your target audience only uses Twitter and Pinterest, for example. Focus on the channels that can bring the best results.
Each social network appeals to a certain demographic in each niche. Here’s what works best on the most popular social media:
- Twitter: Blog posts, curated content, tech-related threads
- Facebook: Curated content and videos
- YouTube: Original video content (programming tutorials, career tips)
- Instagram: Quotes, behind-the-scenes stories, high-quality photos
- Pinterest: How-to guides, step-by-step tutorials, resource round-ups (largest visual search engine worldwide)
- LinkedIn: Professional, career-focused content and news
You need to play around and find out which networks work best for you and your niche.
With that said, build a presence on one network at a time.
Use discussion forums and groups
Building momentum on social media usually takes some time, so you need to be patient.
To speed up your blog promotion, find targeted discussion boards and online communities in your niche.
Again, you need to know where your audience hangs out, and provide value with your input. You can’t just spam discussion threads and groups with links to your blog.
Therefore, make sure you understand what your target audience needs:
- How can you help them out?
- How can you make their lives easier?
Generating visitors through forums and message boards is all about building relationships and trust with potential visitors.
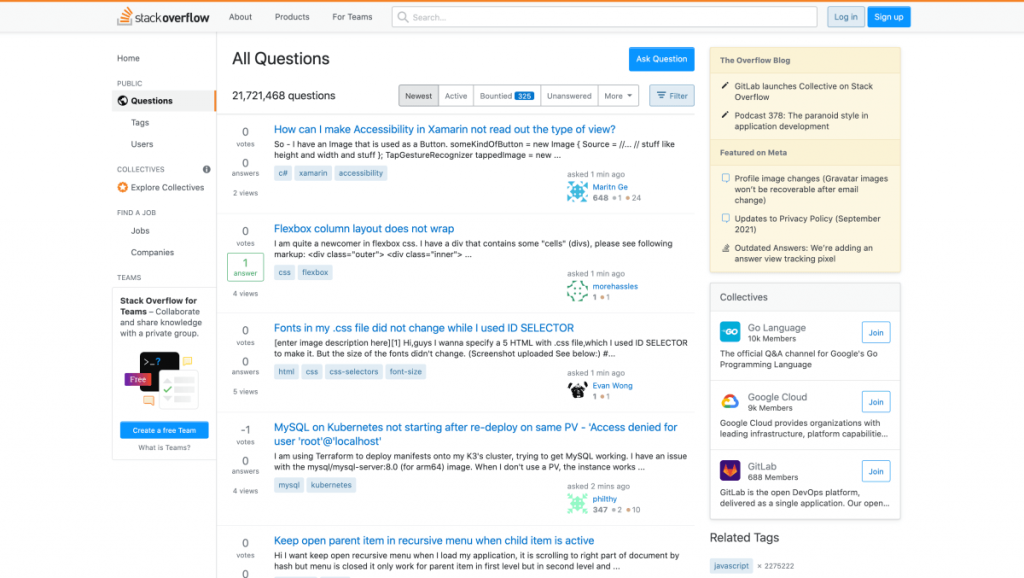
For programming-related topics, try these channels:
- Stack Overflow
- Facebook groups
Learn basic SEO to get organic traffic
Search engine optimization may sound tehcnical and difficult, but it doesn’t have to be.
I see tons of new bloggers struggle with SEO because they feel like it’s rocket science. You know, something they should outsource to an expert to see results.
Can I be honest? – That’s a load of baloney.
If you want to get organic traffic from Google, you only need to do one thing:
Give your audience what they want.
Seriously, it’s as simple as this.
Here are seven steps to make SEO a breeze:
- Find out who your target audience are
- Figure out their biggest problem
- Find out what keywords they type into Google to search for help
- Research your competition
- Figure out what’s missing
- Create better, more comprehensive content
- Target a single keyword with each blog post
When you think about this, it’s surprisingly easy. You simply need to know what people search for, and offer them the best possible content they can find to solve their problem.
So, what are your target audience searching for on Google?
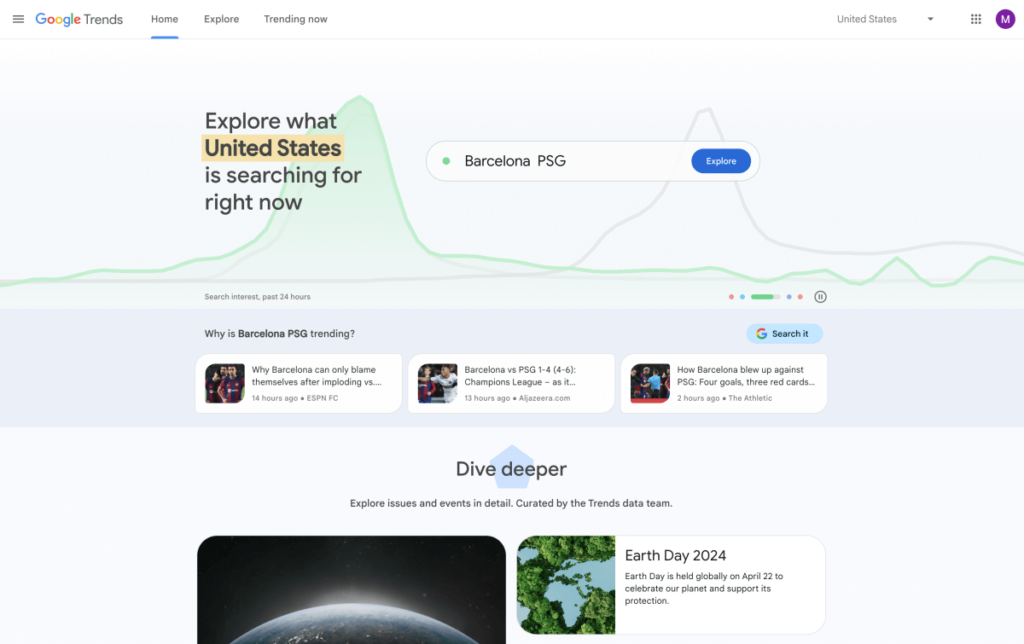
Here are a few tools for finding the right keywords to target:
- Google Trends helps you find seasonal patterns and trending topics.
- KWFinder helps you find low-competition keywords that are easy to rank with.
- Google Search Console helps you spot which keywords you can improve, i.e. the low-hanging fruit.
Guest blogging on other tech websites
Guest blogging on other tech websites is the best way to connect with your target audience through another platform with a larger following.
You get to create content for readers who are interested in your content, too.
If an online publication in your niche already has 1 million readers, why not tap into that pool of potential visitors?
Guest blogging is also a fantastic way to build natural backlinks for your own blog to boost your SEO.
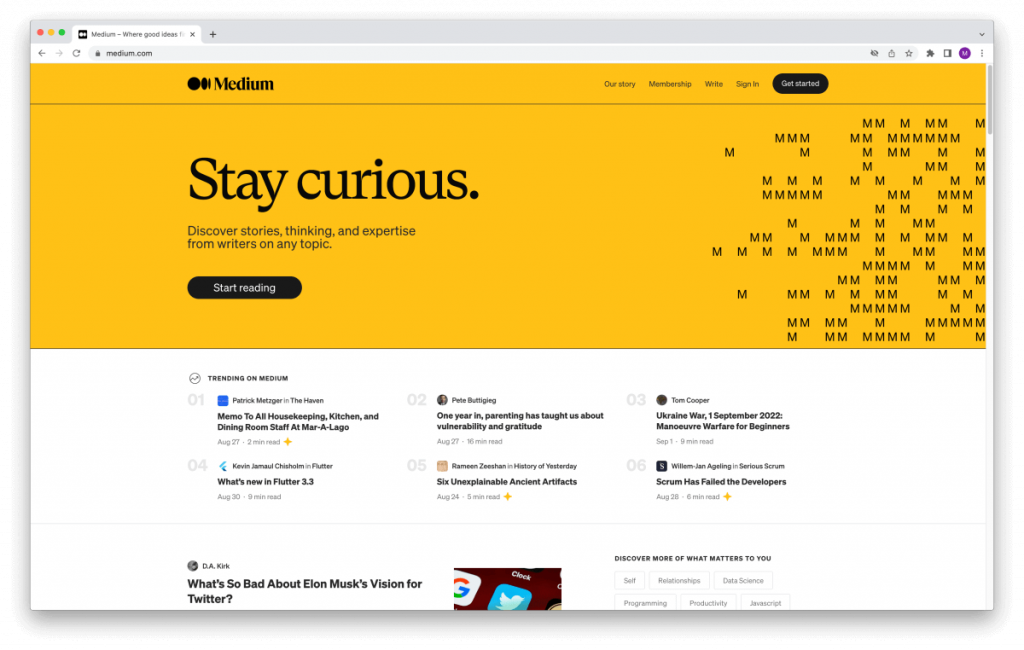
Landing your first guest post may take some time. If you can’t dedicate much time to reaching out to other bloggers, try reposting your content on Medium, for example.
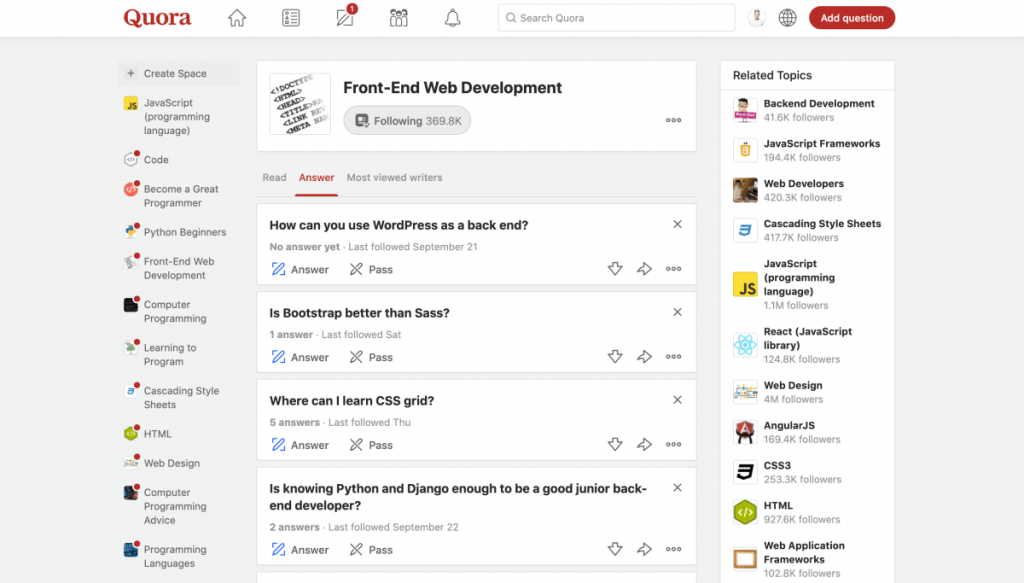
Answer questions on Quora
Quora is a massive Q&A site where you can find programming-related questions and answer them with your best tips.
You can search for a specific tech topic and answer questions you’ve already covered in your blog posts.
For example, here’s an overview of questions on front-end web development people need answers for:
Use an email newsletter
Once your blog generates some traffic, you will start to grow a loyal audience and readership.
As long as you put out helpful content, people will come back and read every blog post you publish.
Therefore, one of the best ways to get visitors to your blog is to keep existing readers engaged.
An email newsletter is the easiest way to drive visitors back to your tech blog website whenever you create new content.
Setting up an email newsletter system for your programming blog is easy.
Place a simple signup form within your blog posts, and send out a quick newsletter on a regular basis.
I use and love MailerLite for my coding blog newsletter. It’s the best free email marketing tool out there.
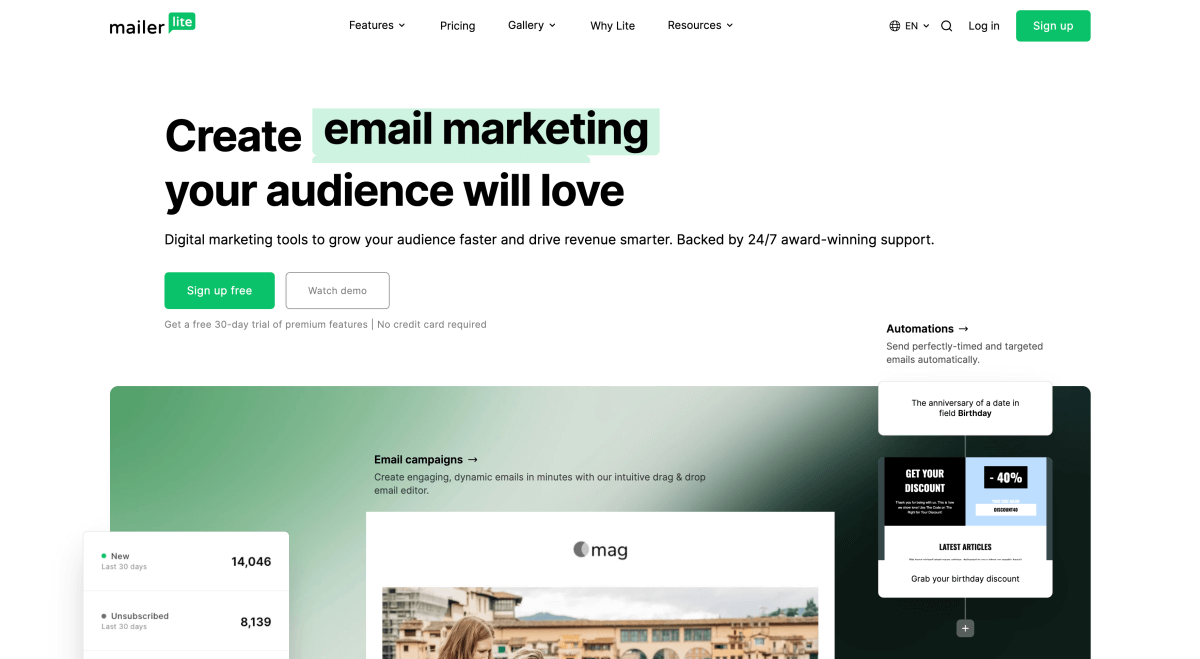
I send my community an update whenever I have a free resource I want to share, or when a new blog post goes live.
This way, I get thousands of visitors to my newest blog posts – and my readers (I love you!) can discover new coding resources more easily.
Want to join my community, too? Sign up here!
Step 9: Monetize your programming blog
Now that you have a clear traffic strategy, let’s discuss monetization.
First things first:
Making money blogging isn’t a get-rich-quick scheme.
When you see someone making seven figures from their blog, those figures aren’t typical. They have worked hard to get there, and it didn’t happen overnight.
You need to take care of the previous steps in this guide before you start thinking about monetizing your content. That’s why I’m covering this topic at the end of this guide.
Of course, if you have a massive audience already, that makes things easier.
But most beginner programming bloggers start with zero followers and build their blogging empire from the ground up.
Hence, I want you to have realistic expectations. Don’t expect to make money from day 1.
Right now, you should focus on working on your content, and monetization will come later.
However, it’s good to be aware of a few ways you can earn money blogging now that you’ve come so far already.
Let me walk you through some of the best monetization strategies for your tech blog.
Some of these methods are easy and quick to set up, while others require more preparation and long-term thinking.
Method #1: Recommend tech products and tools (Affiliate marketing)
Everyone who wants to learn more about programming needs to find the best resources out there. But it’s difficult to know where to start because there are thousands of courses and tutorials to choose from.
When you blog about tech, you may want to recommend a few tools and resources to your readers that you have found helpful.
Perhaps you’ve taken a programming course or found a programming book that helped you understand a specific topic better?
So why not recommend it to your readers and earn a few bucks without any extra cost to them? It’s a total win-win!
Most big brands have affiliate programs. Here’s how they work:
- Sign up to become an affiliate partner
- Recommend those resources to your readers on your blog
- Add your affiliate link to your blog posts
- Earn a commission when someone makes a purchase through your link
Of course, you only want to recommend products you actually use and love.
Moreover, you should be mindful of how those products help your readers. That way, you can create top-notch content that’s valuable, such as:
- How-to guides for using the product
- Detailed reviews with pros and cons
- Step-by-step tutorials
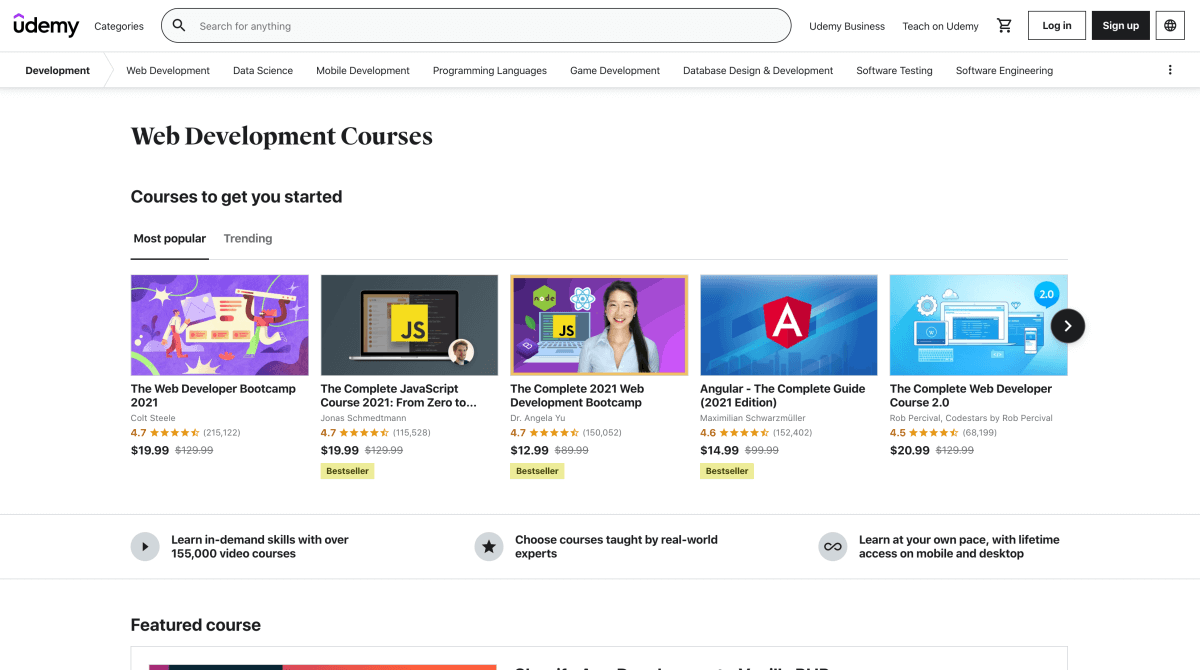
For example, I started learning to code with The Complete Web Developer Course 2.0 on Udemy.
I’m a massive fan of the course, so I started recommending it to anyone serious about learning in-demand web dev skills from scratch.
But it took me about 12 months to figure out that I could become an affiliate partner for Udemy. So I signed up, inserted my affiliate link to my blog posts about the course and the entire platform, and started earning money that I now use to keep this blog up and running.
Method #2: Sell courses and tutorials
Programming and web dev skills are in high demand on the job market, and it’s never been easier to learn tech skills online.
If you feel comfortable teaching others what you know, why not create and sell your own video course, for example?
Focus on a very specific topic, and find out what people are struggling with in that field. You can promote your course to your readers and email subscribers to generate sales.
Method #3: Sell freelance services
If you want to earn a side income from your tech blog quickly, selling freelance services and offering your expertise is an easy strategy.
First, you need to know who you’re targeting:
- Who is your ideal client?
- What do they need help with?
- Why are they reading your blog?
- How can you help them? What value can you offer?
If you have a programming skills that’s in demand on the job market, showcase your work samples on your blog.
If you don’t have any work samples yet, create them one by one, and publish them on your blog. Once they’re live, you are ready to start pitching potential clients.
Here are a few examples of what skills your could offer:
- Writing skills – Review clients’ products, write how-to tutorials, etc.
- Programming skills
- WordPress skills
- Web design skills
- Online marketing skills
- SEO skills
The list could go on because any technical skills can be sold.
If you are interested in freelancing, definitely check out my article on how I made my first $1,000 freelancing.
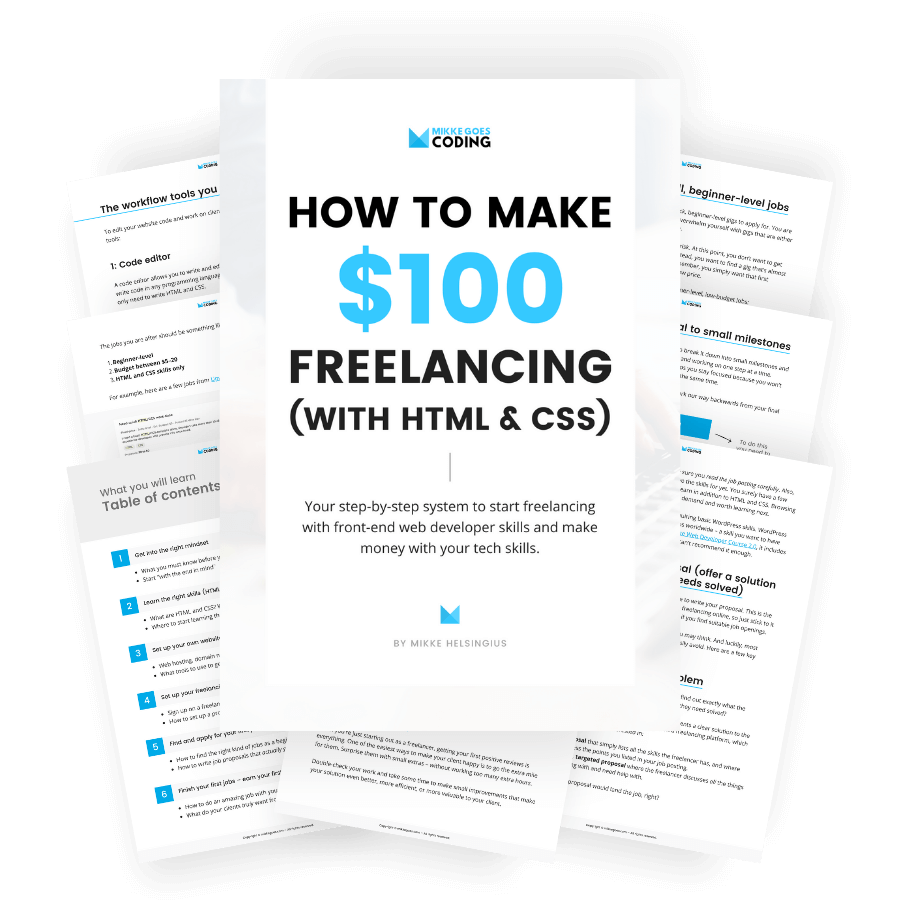
For a hands-on beginner’s guide, grab your copy of my freelancing starter guide.
Method #4: Sell advertising space
Display ads are a somewhat controversial but a very powerful monetization method once your blog traffic starts growing.
You can sign up with a display ad network and place ads on your blog. Every time those ads are displayed or someone clicks on them, you will earn money.
Ads are easy and quick to set up, but the income potential doesn’t ramp up until you have at least 10,000 monthly visitors.
Here are a few legit display ad networks you could consider:
- AdSense by Google is easy to set up. No minimum traffic requirement.
- Infolinks is a beginner-friendly ad network. No minimum traffic requirement.
- Monumetric is a full-service ad network with a helpful team of experts to support your blog monetization strategy. You need a minimum of 10,000 monthly pageviews to join.
I used display ads from Monumetric until recently on this blog, and they made decent money. I paid my rent with that ad income.
However, I gave up those ads so that I could optimize my other income sources and improve the overall user experience on my blog.
Whether you use ads is entirely up to you. They are easy to set up, and the income is 100% passive.
Method #5: Cooperate with brands
Once you establish yourself as an authoritative blogger in your niche, you want to look into landing sponsored content cooperations with relevant brands and products.
Sponsored content means that a company or brand pays your to publish their content or feature their product on your blog.
It may take some time to generate enough traffic to land your first cooperation deal. It depends on (1) what your blog is about and (2) how engaged your readers are.
Broadly speaking, brands expect your to have at least 5,000–10,000 monthly visitors.
To get an idea of how much to ask for a sponsored blog post, check out this hlepful blogger rate card that I use, too.
Please note: You should always make it very clear to your readers whenever you publish a sponsored blog post.
The FTC requires you to disclose your partnerships in each piece of sponsored content, whether it’s a blog post, an email, a podcast episode, a social media piece, or anything else.
What monetization method should you use?
It all boils down to what your readers want from you. There’s no universal “best” way for making money with your programming blog.
You want to be mindful of what methods work best in your niche, and align them with how your work and what you know.
Here are a few strengths and how you could monetize them:
- Writing skills:
If you love technical writing, offer freelance services or sell e-books. - Speaking skills:
Good speakers make great teachers. Start a YouTube channel with video tutorials or create an online course. - Teaching skills:
Build an online course or offer tutorials on your website. - Design skills:
If you love front end programming, why not create website templates or WordPress themes?
Final thoughts: How to start a programming blog
Starting a programming blog is a fantastic way to build an online presence and give back to the tech community.
You can share your experiences, offer valuable resources to like-minded techies, and establish yourself as an expert in your niche.
Here’s a quick recap of what you need to do to start a programming blog:
- Choose a blog topic you enjoy working with
- Pick and register a catchy domain name
- Set up a web hosting account
- Get comfortable with WordPress
- Create the main pages for your blog (About, Contact, Legal)
- Research keywords to find blog post ideas
- Create valuable, helpful content
- Promote your blog to get visitors
- Set up a monetization strategy
Launching your own blog requires a lot of dedication and determination because you’re wearing quite a few hats as a blogger. But I hope this article helped you get a good overview of where to start and what to do next.
So, are you ready to start? Then head over to Bluehost to set up your domain, web hosting, and WordPress.
Or are you still on the fence about blogging? If so, let me know how I can help you in the comments section.
I’m more than happy to share what I’ve learned so far and help you get your blog up and running the right way.
Here are a few articles you may want to read next:
- How to Build a Website From Scratch: Step-by-Step Guide
- Make Money Coding: 12 Money Making Methods for Developers
- How to Create a Portfolio Site on WordPress: Beginner’s Guide
P.S. If you’re serious about blogging, check out my other blog with in-depth articles on how to start a blog, how to make money blogging, how to become a successful affiliate marketer, how to start an email list, and more.
Happy blogging!
– Mikke

There is a lot of great advice in this article. Thank you for putting it together. I especially enjoyed your comments on creating valuable content. You give some excellent suggestions on how to discover what subject matter is correct for each author.
This is one great post about starting a blog (in programming niche).
I was wandering why everybody suggests picking only one niche when you can select and run a couple more on a same site/blog. Most of the sites have several site categories that are not related not even close and still those sites are more successful because are not targeted to only one specific audience.